This article is for school and district account managers who want to upload multiple student documents at once and have Overgrad automatically match them to the correct student records. It covers selecting a document type, uploading files, reviewing the AI's matches, and completing the import.
TABLE OF CONTENTS
- Selecting a Document Type
- Uploading Your Documents
- Processing and Reviewing Matches
- Completing the Import
- Viewing Past Imports
Selecting a Document Type
- Prepare your document: Files must be in a single, readable PDF for each file type and must include the student ID number. All documents in a single import batch must be the same document type. If you have a mix of transcripts and score reports, run them as separate imports.
- From the top navigation bar, select Application Manager > Document Import.
- Click New Import (or Start Your First Import if this is your first time using the tool).
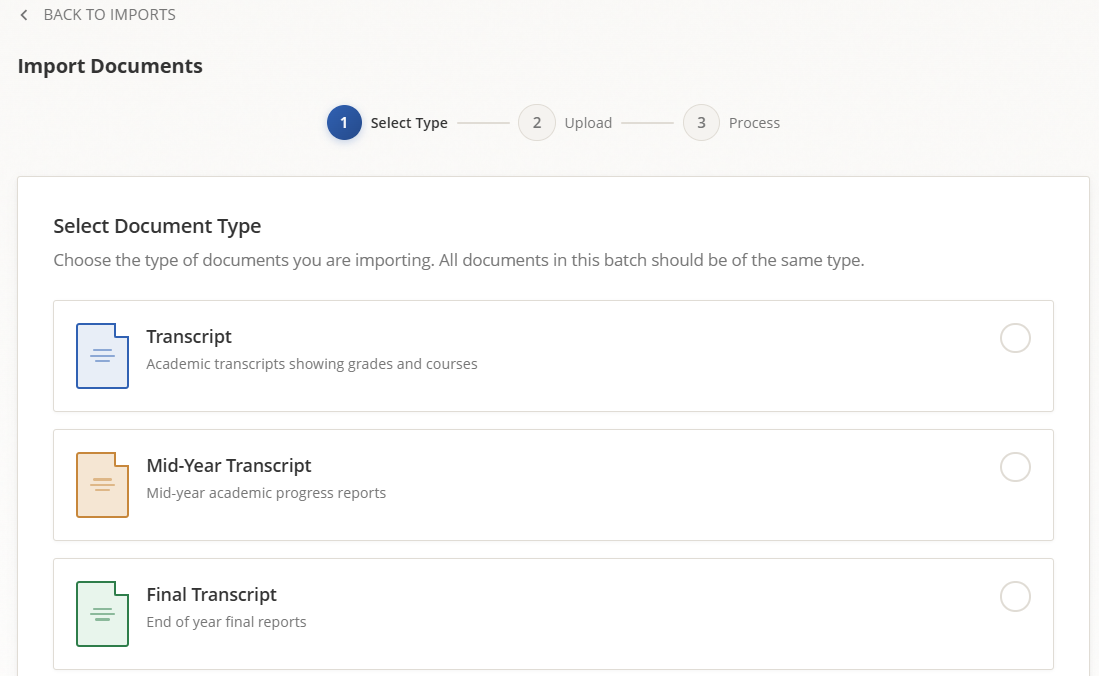
- Choose the type of document you're importing. The following document types can be uploaded:
- Transcript
- Mid-Year Transcript
- Final Transcript
- Course Schedule
- SAT Score Report
- ACT Score Report
- Fee Waiver.
- Click Continue.
Uploading Your Documents
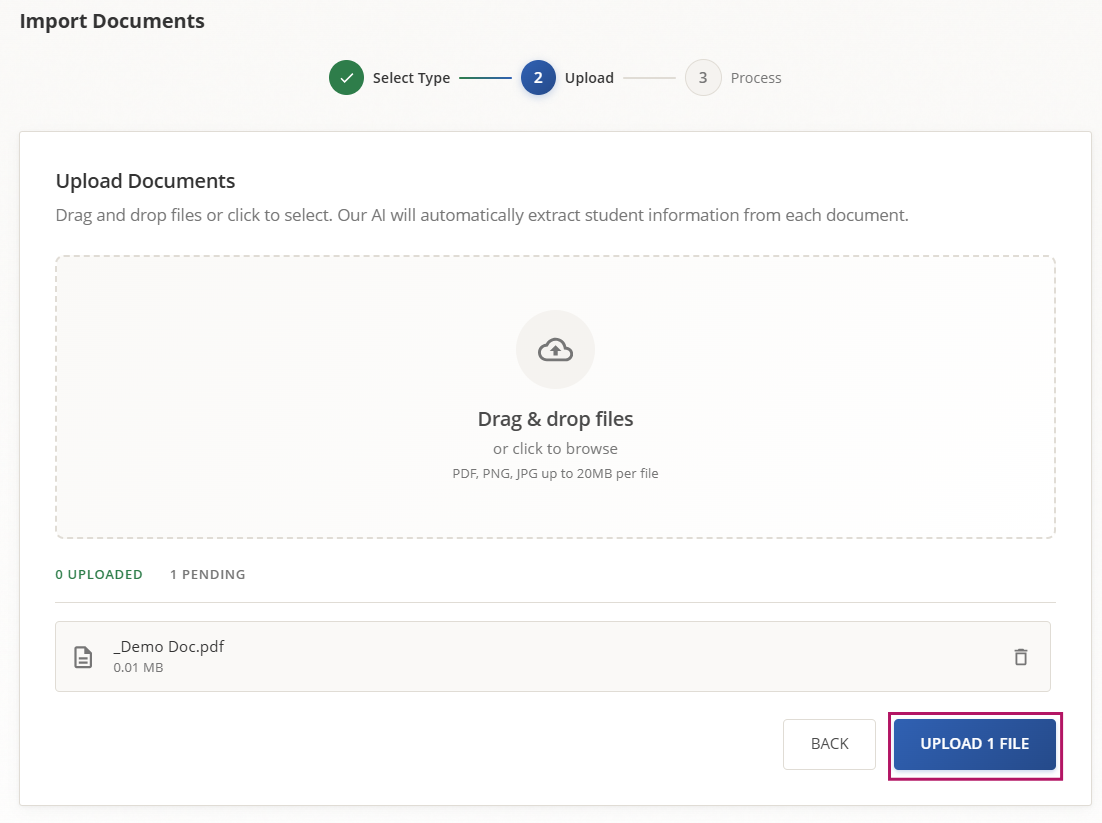
- Drag and drop your files into the upload area, or select or click to browse to choose a file from your computer.
- Confirm the files you want to include appear in the list. Click the trash icon next to any file to remove it before uploading.
- Click Upload [X] File(s). This process may take a few minutes depending on the file size.
Files must be PDF, PNG, or JPG format and no larger than 20MB each.
Processing and Reviewing Matches
- Once your files finish uploading, click Process Documents.
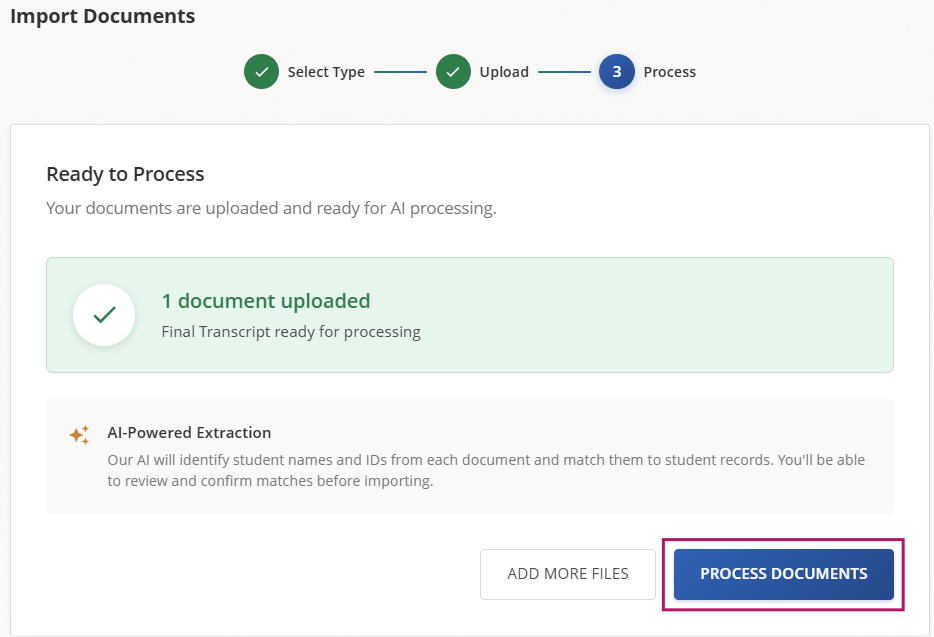
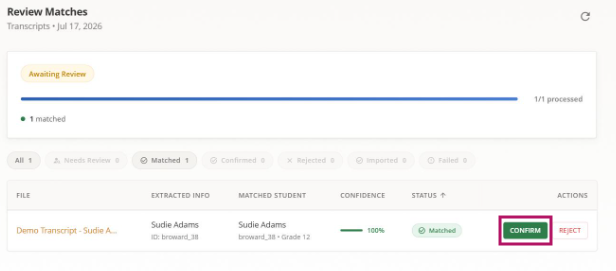
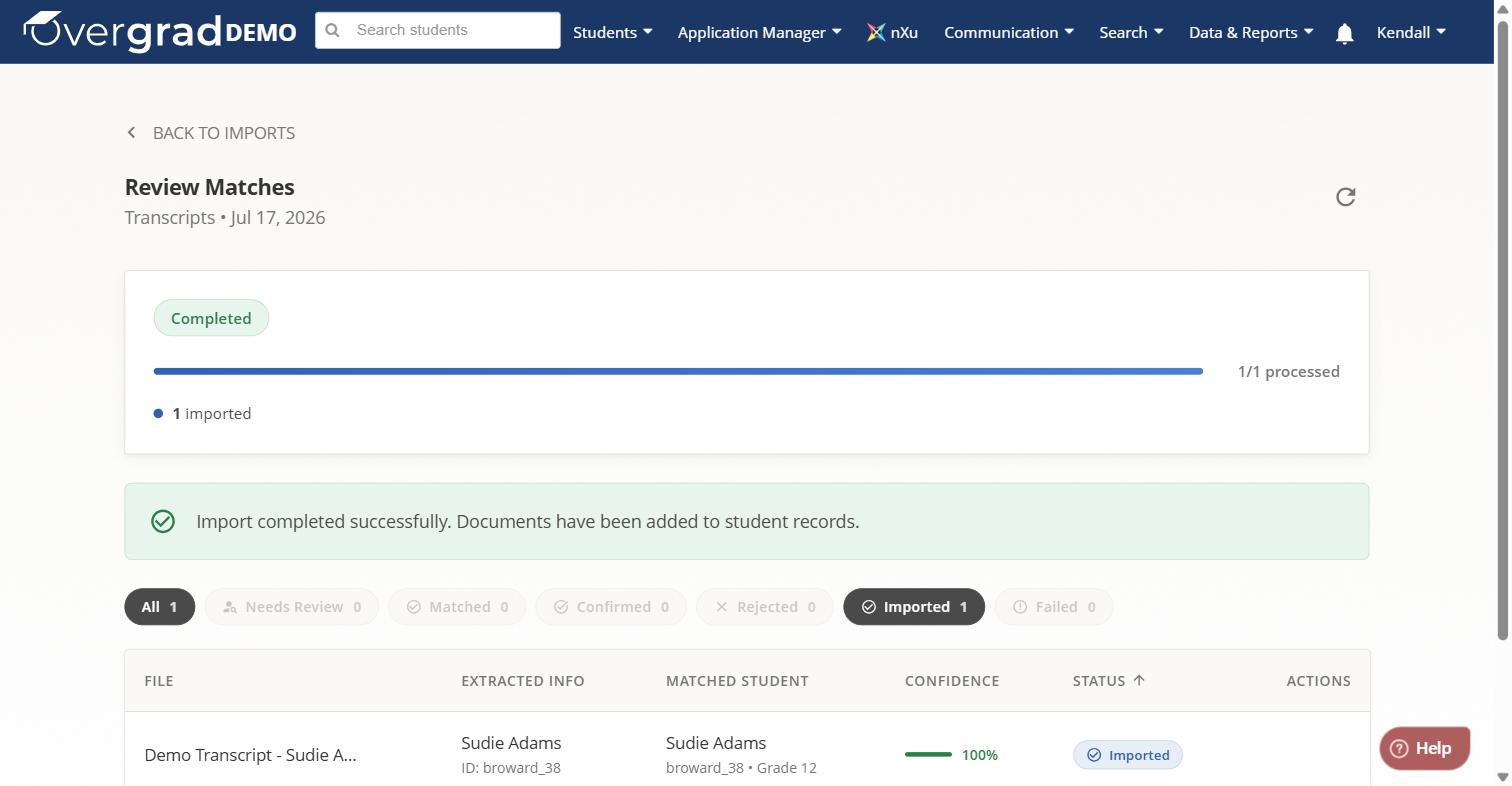
- Overgrad's AI reads each document, extracts the student's name and ID, and matches it to a student record. This process can take 5-10 minutes depending on file size. Once the processing is complete, you'll land on the Review Matches screen, which lists each file along with its extracted info, matched student, and a confidence score.
- Use the filter tabs (Needs Review, Matched, Confirmed, Rejected, Imported, Failed) to focus on specific documents.
- Documents extracted with low confidence may need a closer look - check the Needs Review tab for any files that couldn't be automatically matched.
- If there is a suspected match but not with 100% confidence, you can select the correct student to match the document with
- For each match, click Confirm if the matched student is correct, or Reject if it isn't.
Completing the Import
- Once you've confirmed the matches you want to import, click Import [X] Document(s).
- Wait for the import to finish. You'll see a confirmation message once it's done: "Import completed successfully. Documents have been added to student records."
Imported documents are added directly to each matched student's record and appear under Application Manager → Manage Documents as well as in each student's Application Manager tab on their profile.
Viewing Past Imports
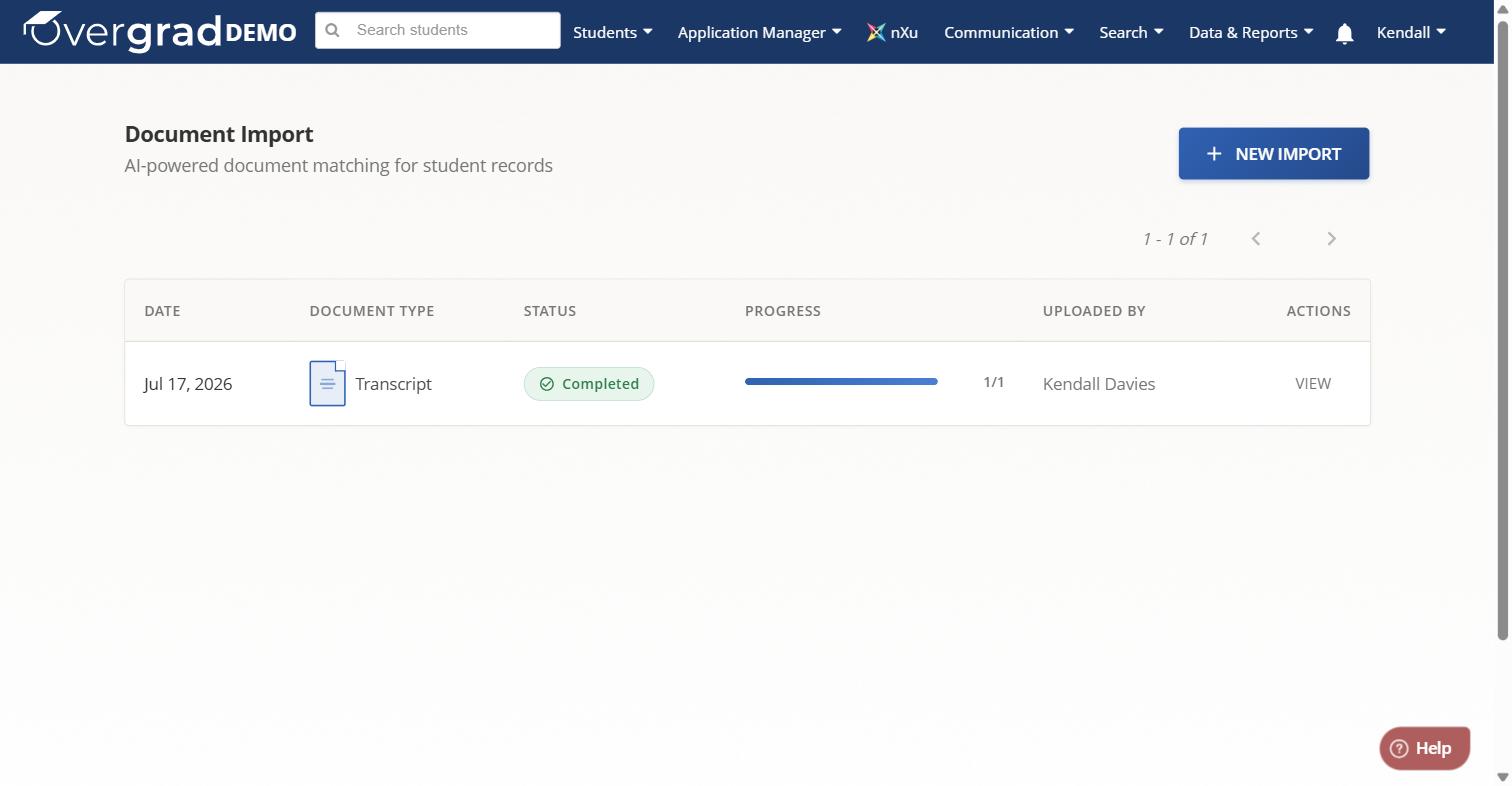
Return to the Document Import page at any time to see a history of your imports, including the date, document type, status, progress, and who uploaded it. Click View next to any row to revisit that import's matches.
NOTE: Once you upload documents you will NOT be able to delete them in bulk. Documents can be individually deleted from Application Manager before they have been send to institutions.
Still need help? Contact the Overgrad support team at support@overgrad.com.
Was this article helpful?
That’s Great!
Thank you for your feedback
Sorry! We couldn't be helpful
Thank you for your feedback
Feedback sent
We appreciate your effort and will try to fix the article