This feature is only available to Overgrad Complete and Overgrad x nXu customers. Please connect with an Overgrad rep if you are interested in learning more.
The nXu Assessment System is administered through Overgrad's Custom Surveys feature. When creating an nXu assessment, you can either start from an nXu assessment template or create a customized assessment from scratch.
Before You Begin
Before creating your assessment, determine which nXu skills you want to assess with your students.
If your school or organization is following one of nXu's templated scopes and sequences, we recommend starting with the corresponding nXu assessment template (option 1 below). The template will automatically include the skills aligned with that scope and sequence. Note that if you choose option 1, you can still customize the template survey by adding and removing skills and/or by adding your own custom questions.
If you have created your own scope and sequence, you can instead create an assessment from scratch and select the nXu skills you want to assess.
Option 1: Create an Assessment Using an nXu Template
Step 1: Navigate to Custom Surveys
From your Overgrad educator account:
Open the Communication dropdown menu.
Select Custom Surveys.
Select the option to start from a template:
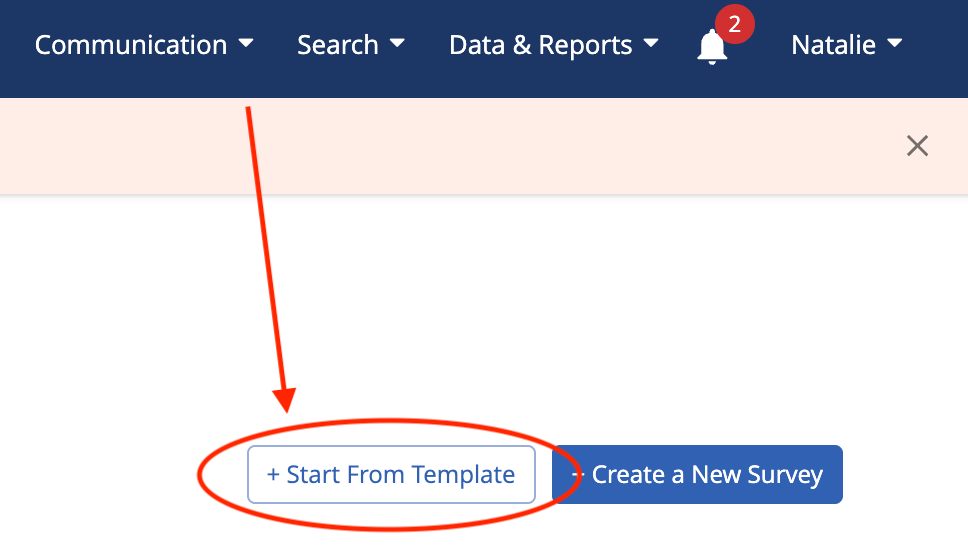
Step 2: Select Your nXu Assessment Template
Find the nXu assessment template that corresponds with the scope and sequence your school or organization is implementing. (As a reminder, nXu’s template scope and sequence documents can be found here.)
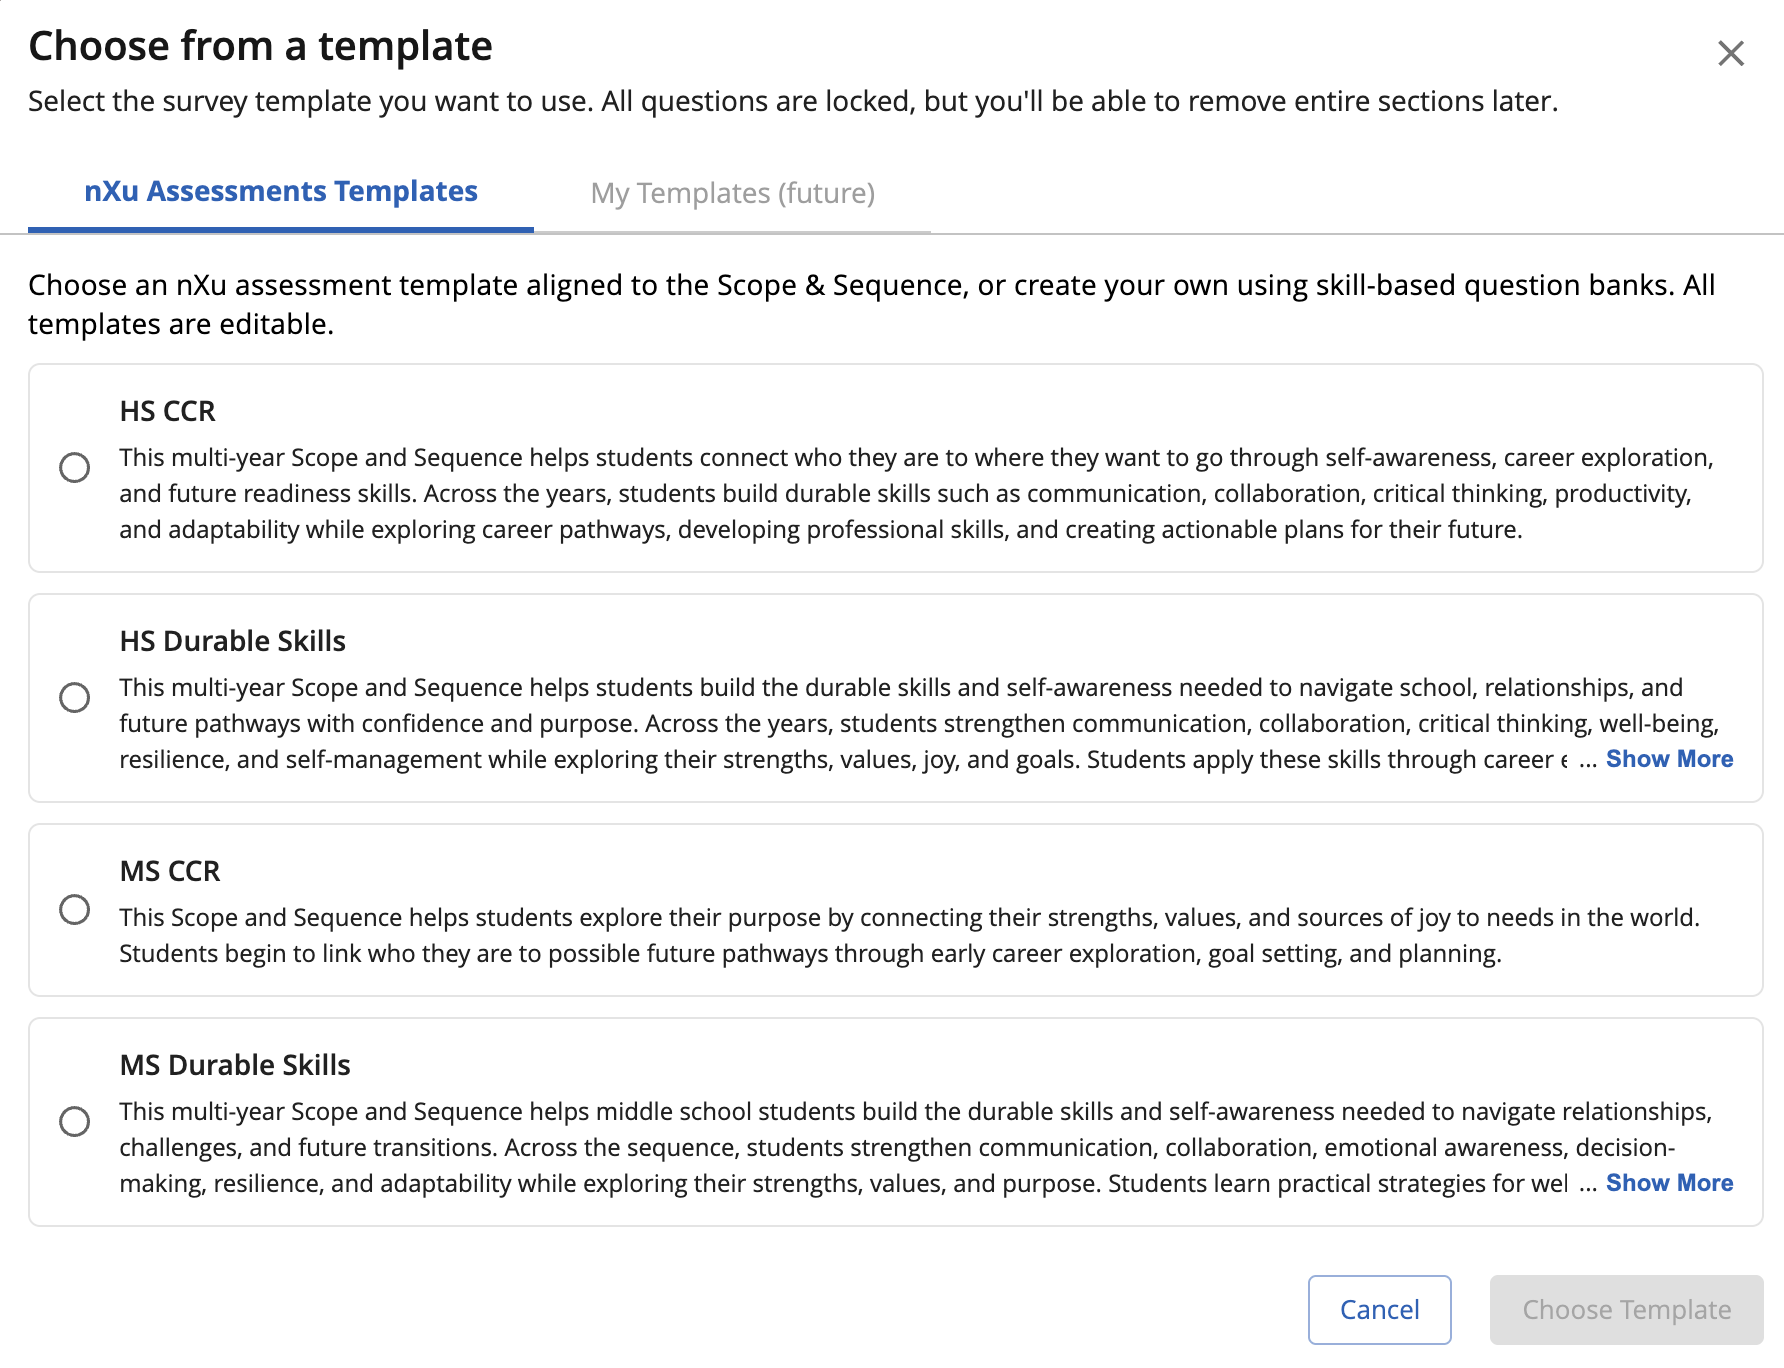
Select the appropriate template and click Choose Template.
Step 3: Complete Your Survey Details
Complete the required survey details, including your survey title, availability and due dates, survey settings, and educator access.
For more information about these settings, see the Creating and Assigning Custom Surveys support article.
Once you have completed the required fields, select Save and Continue.
Step 4: Review Your nXu Skills
Your template will automatically include groups of assessment items corresponding with the nXu skills included in your template scope and sequence.
Review the skills to make sure they reflect the content your students have experienced.
You can:
Review the questions within each skill by clicking on the right-arrow icon:
 (Note that the individual questions within skills are not editable to maintain the validity of the assessment. If you do not want to assess a particular skill, remove the entire skill section rather than individual nXu assessment items.)
Remove an entire skill that you do not want students to assess by selecting the trash can icon for that skill.
Reorder skills/sections by dragging and dropping them using this icon:

Add custom questions if your school or organization wants to collect additional information from students by clicking “Add Question” at the bottom:
 You can change the question type (e.g., multiple choice, short text, etc.), add the question title, and add survey validation such as requiring that the response be in certain formats (e.g., number or email format).
 Add other nXu skills by clicking “Add from Question Bank” at the bottom:

Important: We recommend including around 30–50 questions to ensure higher participation and more accurate responses. Near the bottom, you’ll see the total number of questions: 
Once your assessment includes the skills and any additional questions you want students to complete, select Save and Continue.
Once you have created your assessment, you'll need to assign it to the appropriate students and open the survey for responses. Head here to “Part 2” for step-by-step instructions for:
Completing survey settings
Managing educator access
Adding and removing students
Opening the survey
Communicating the survey assignment to students
Option 2: Create a Customized nXu Assessment From Scratch
If your school or organization has created a customized scope and sequence—or you otherwise need an assessment that does not align with one of the available templates—you can build your nXu assessment from scratch.
Step 1: Create a New Survey
Navigate to Communication → Custom Surveys and select the option to create a new survey:
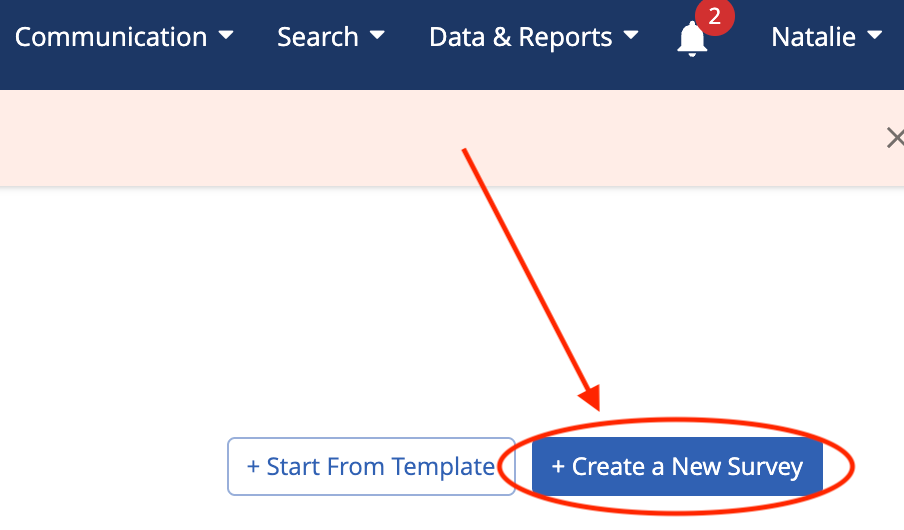
Complete the required survey details, including your survey title, availability and due dates, survey settings, and educator access, and select Save and Continue. (For more information about these settings, see the Creating and Assigning Custom Surveys support article.)
Step 2: Add nXu Assessment Skills
From here, you can:
Add nXu skills by clicking “Add from Question Bank”:

Review the questions within each skill by clicking on the carrot icon:

Note that the individual questions within skills are not editable to maintain the validity of the assessment. If you do not want to assess a particular skill, remove the entire skill section rather than individual nXu assessment items.
Add custom questions if your school or organization wants to collect additional information from students by clicking “Add Question”:
 You can change the question type (e.g., multiple choice, short text, etc.), add the question title, and add survey validation such as requiring that the response be in certain formats (e.g., number or email format).
 Reorder skills/sections by dragging and dropping them using this icon:

Remove an entire skill that you do not want students to assess by selecting the trash can icon for that skill.
You can also create survey sections to organize the survey for students.
Important: We recommend including around 30–50 questions to ensure higher participation and more accurate responses. Near the bottom, you’ll see the total number of questions: 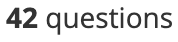
Once your assessment includes the skills and any additional questions you want students to complete, select Save and Continue.
Once you have created your assessment, you'll need to assign it to the appropriate students and open the survey for responses. Head here to “Part 2” for step-by-step instructions for:
Completing survey settings
Managing educator access
Adding and removing students
Opening the survey
Communicating the survey assignment to students
Was this article helpful?
That’s Great!
Thank you for your feedback
Sorry! We couldn't be helpful
Thank you for your feedback
Feedback sent
We appreciate your effort and will try to fix the article