Developing Milestone Plans
Overview
This article is for educators and administrators who want to deliver a targeted set of Milestones to a specific group of students. It covers how to create a Milestone Plan, add and remove students, and choose which Milestones appear in the plan.
To edit, delete, or report on plans you've already created, see Managing Milestone Plans. For creating and editing individual Milestones, see Customizing and Navigating Milestones for Educators.
TABLE OF CONTENTS
Understanding Milestone Plans
Milestone Plans are the organizational framework for how Milestones are delivered to students. Think of them as curated roadmaps that guide students through their college and career readiness journey. All students are automatically assigned to the "Core" plan by default. This plan contains the complete set of default Overgrad Milestones, which can be edited and customized by District Account Managers to better suit your district's specific needs.
Milestone Plans control which Milestones each student sees. Every student is automatically assigned to the Core plan when their account is created. Core contains Overgrad's default Milestones, which District Account Managers can customize.
A custom plan adds a focused set of Milestones for a specific group, such as an academy, an athletic track, or a college access program like AVID. Students in a custom plan see their Core Milestones plus the Milestones in that plan. Students not in the plan don't see those additional Milestones.
Creating a Milestone Plan
Navigate to Communication → Milestones, then select the Milestone Plans tab.
Choose High School Plans or Alumni Plans to view existing plans of that type.
Click the blue + New Milestone Plan button.
Enter a Milestone Plan Name.
Under Milestone Plan Type, select High School Plan or Alumni Plan.
Click Create Plan.
Your new plan appears in the table with its student count and the number of Milestones by grade.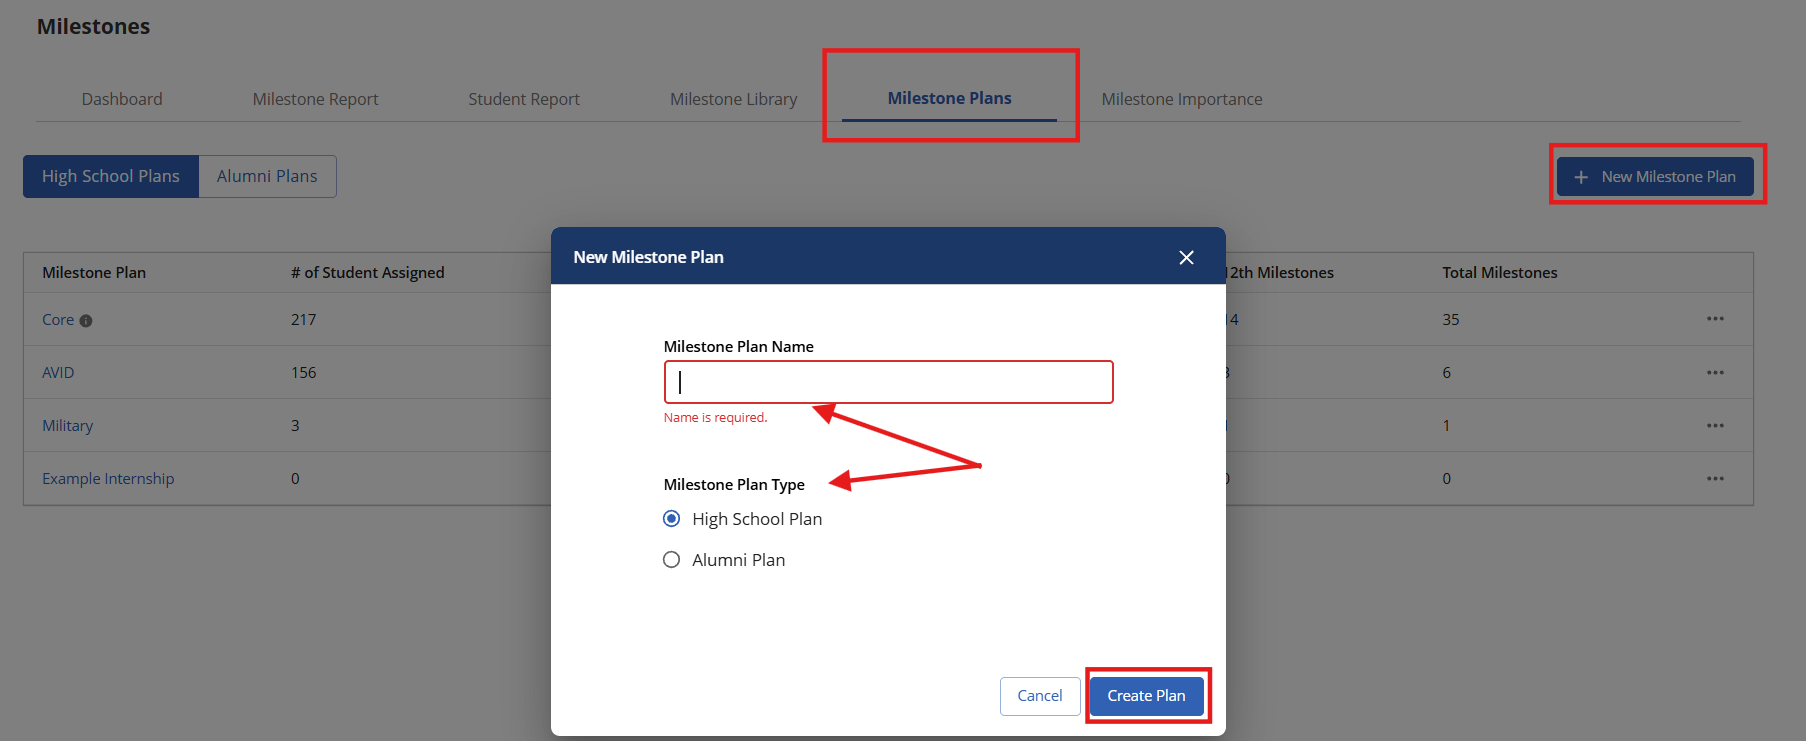
Adding Students to a Plan
On the Milestone Plans tab, click the plan name, or click the ••• icon on its row and select Manage Plan.
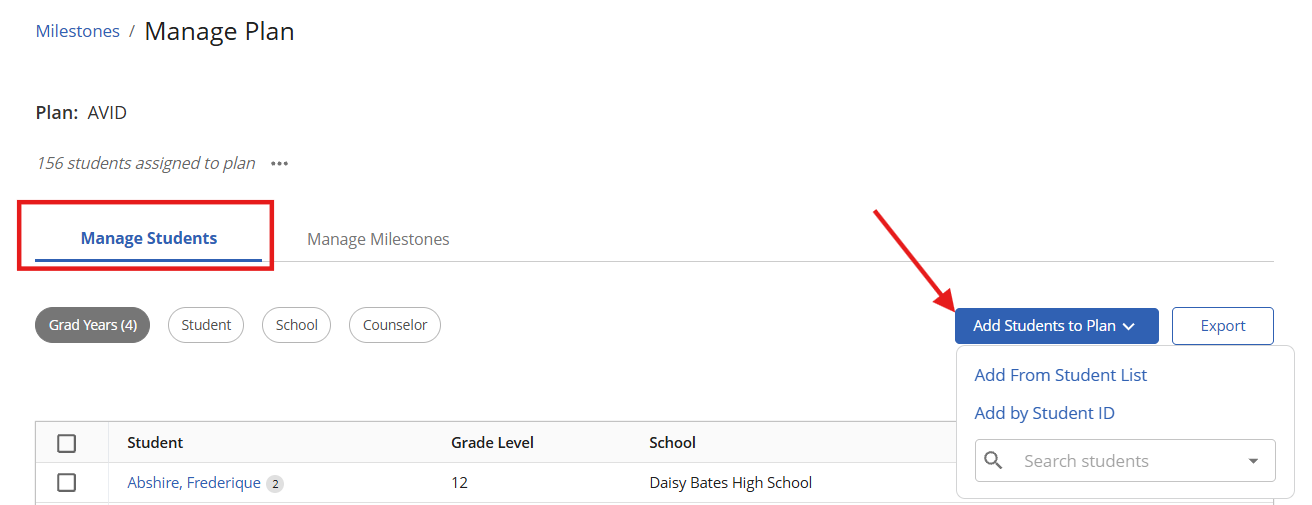
On the Manage Students tab, click Add Students to Plan.
Choose how to add students:
Add From Student List — opens the Student List so you can filter and select students.
Add by Student ID — paste student IDs, one per row or separated by commas, then click Add.
Search students — type a student's name in the search box to add them individually.
Only students assigned to this plan appear in the Manage Students table. Use the Grad Years, Student, School, and Counselor filters to narrow the list, or click Export to download it.
Removing Students from a Plan
On the Manage Students tab, check the box next to each student you want to remove.
Click the ••• icon in the blue bar above the table.
Select Remove from Plan.
Removed students keep their Core Milestones.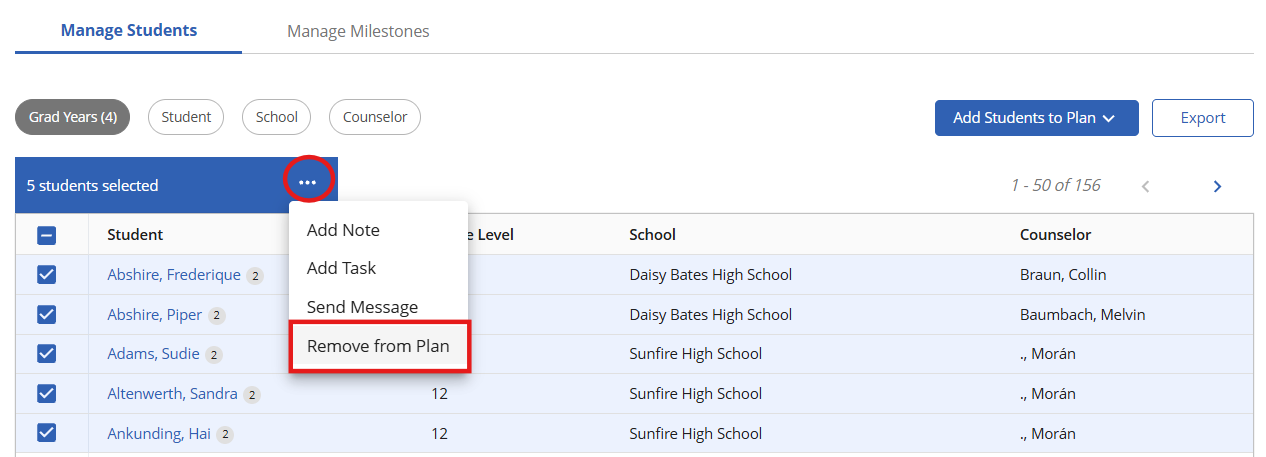
Adding Milestones to a Plan
You can reuse existing Milestones or create new ones for the plan.
Open the plan and select the Manage Milestones tab.
Do one of the following:
Reuse a Milestone: scroll to Milestones Not Being Used and click a Milestone. In the panel that opens, check this plan under Visibility and save.
Create a Milestone: click + New Milestone and complete the form.
Milestones in the plan appear in the colored grade columns at the top of the tab.
Note: One Milestone can appear in more than one plan. Use the Visibility checkboxes on any Milestone to choose which plans show it.
For details on each Milestone field, see Customizing and Navigating Milestones for Educators.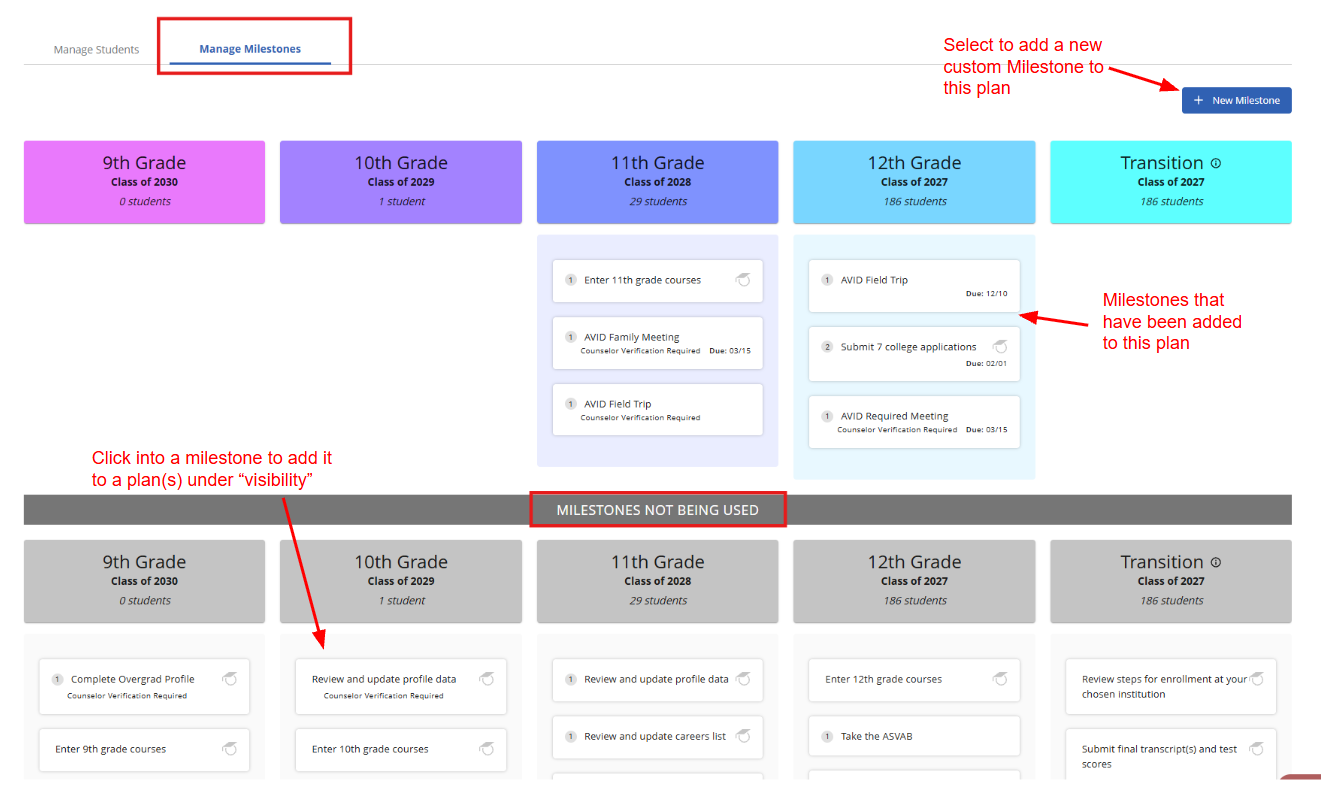
Still need help? Contact the Overgrad support team at support@overgrad.com.
Was this article helpful?
That’s Great!
Thank you for your feedback
Sorry! We couldn't be helpful
Thank you for your feedback
Feedback sent
We appreciate your effort and will try to fix the article