Overview
This article is for Account Managers who want to choose which fields appear in the header at the top of every student profile. It covers opening the Student Header settings, adding, removing and reordering fields, and how school headers relate to the district header. To edit an individual student's information instead, see Editing/Updating an Individual Student Account.
Note: Only educators with Account Manager access can customize the student header. A School Account Manager can edit their own school's header. A District Account Manager can edit the district header and the header for any school in the district.
TABLE OF CONTENTS
- Overview
- Opening the Student Header Settings
- Choosing Which Header to Edit
- Reviewing the Header Layout
- Adding Fields to the Header
- Removing Fields from the Header
- Reordering Header Fields
- Saving Your Changes
- Reverting a School to the District Header
- Deleting a Custom Field Used in the Header
- Still need help?
Opening the Student Header Settings
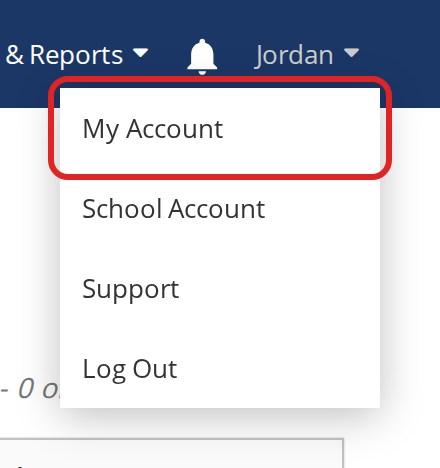
- Click your name in the top-right corner of Overgrad and select My Account.
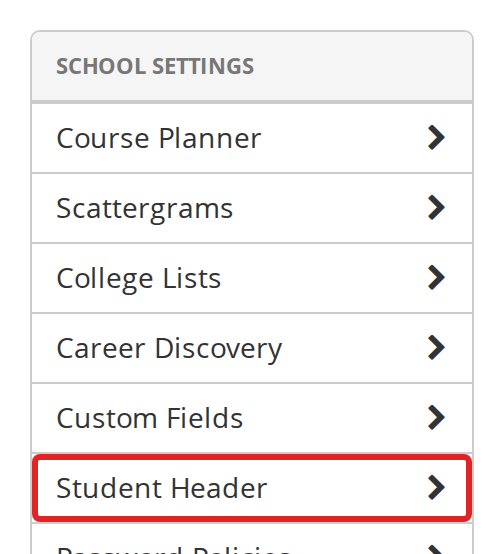
- Under School Settings on the left, click Student Header.
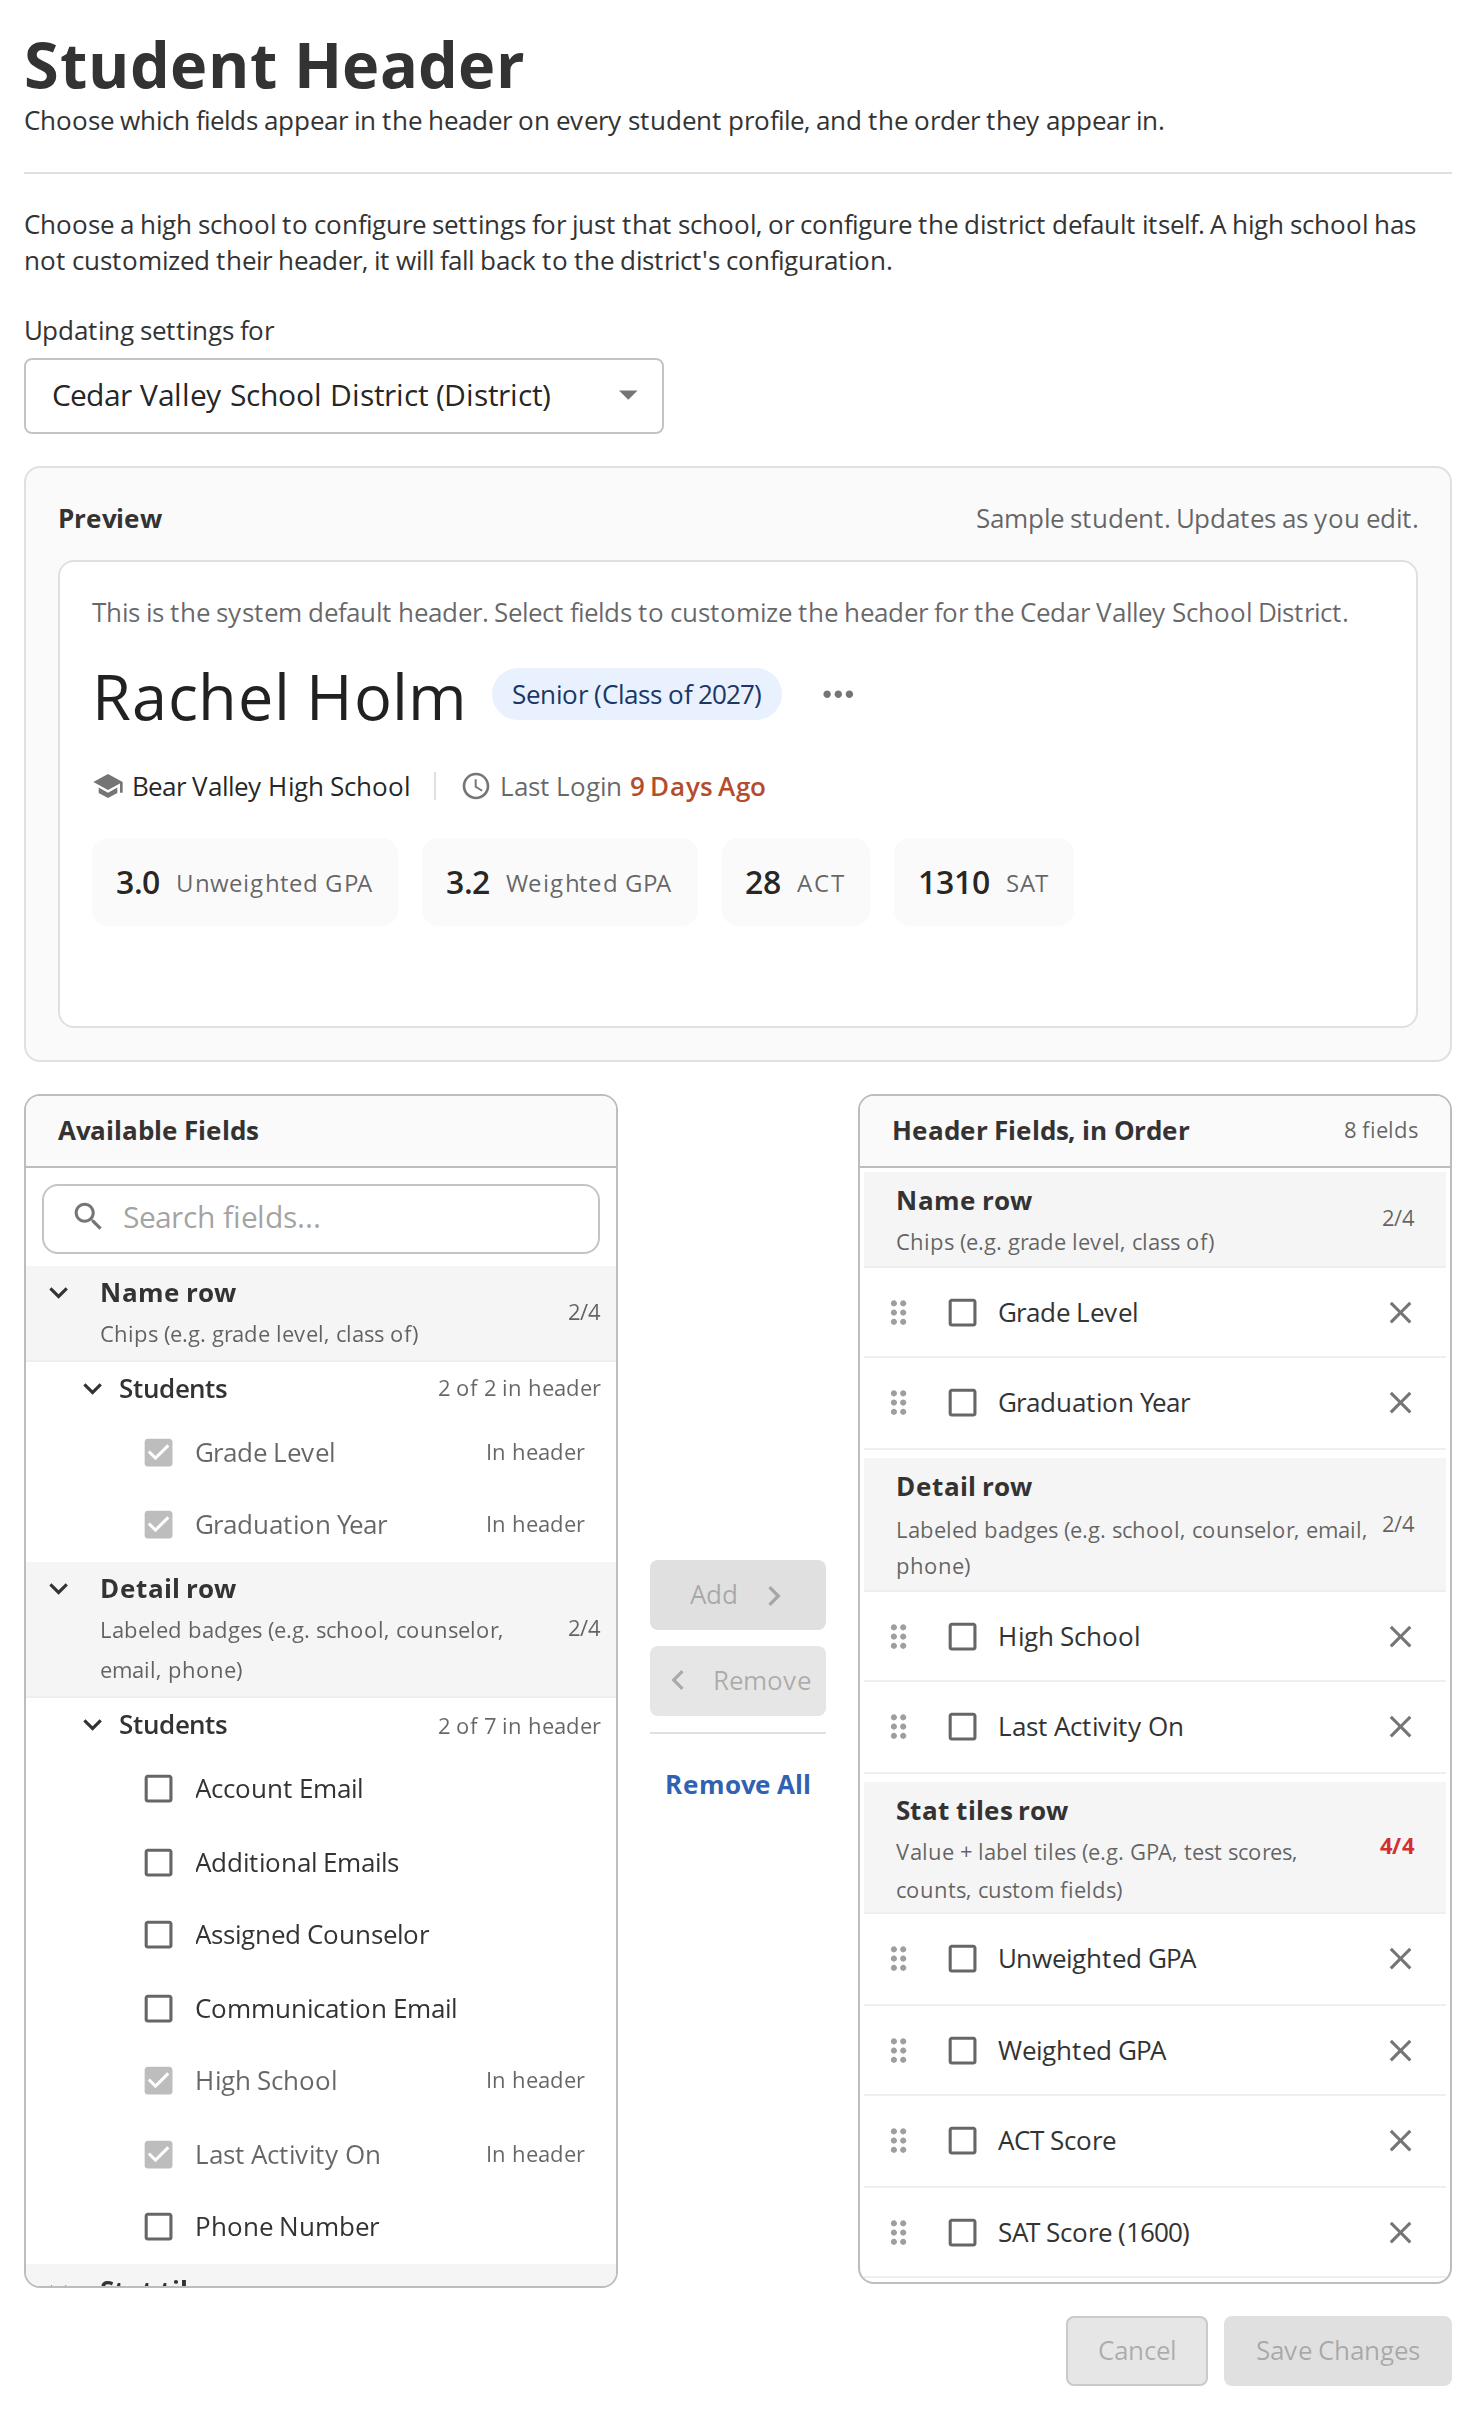
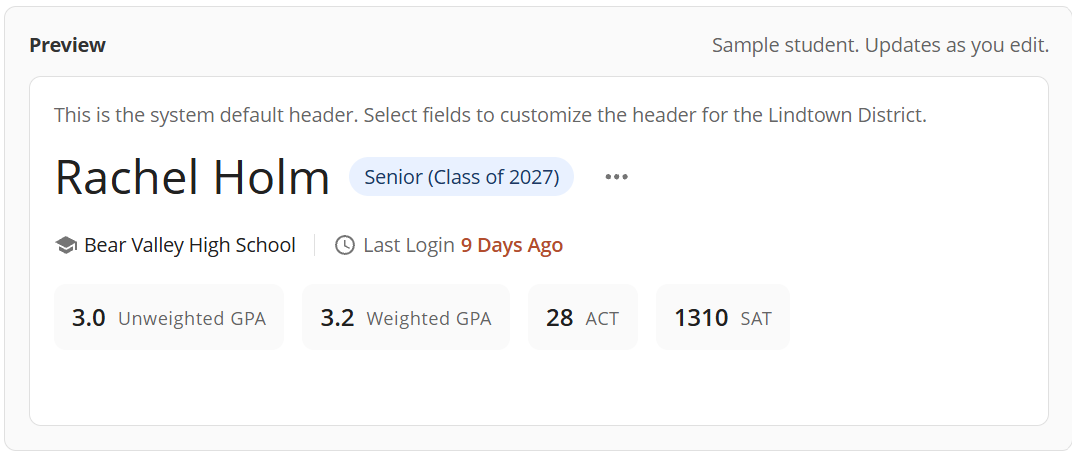
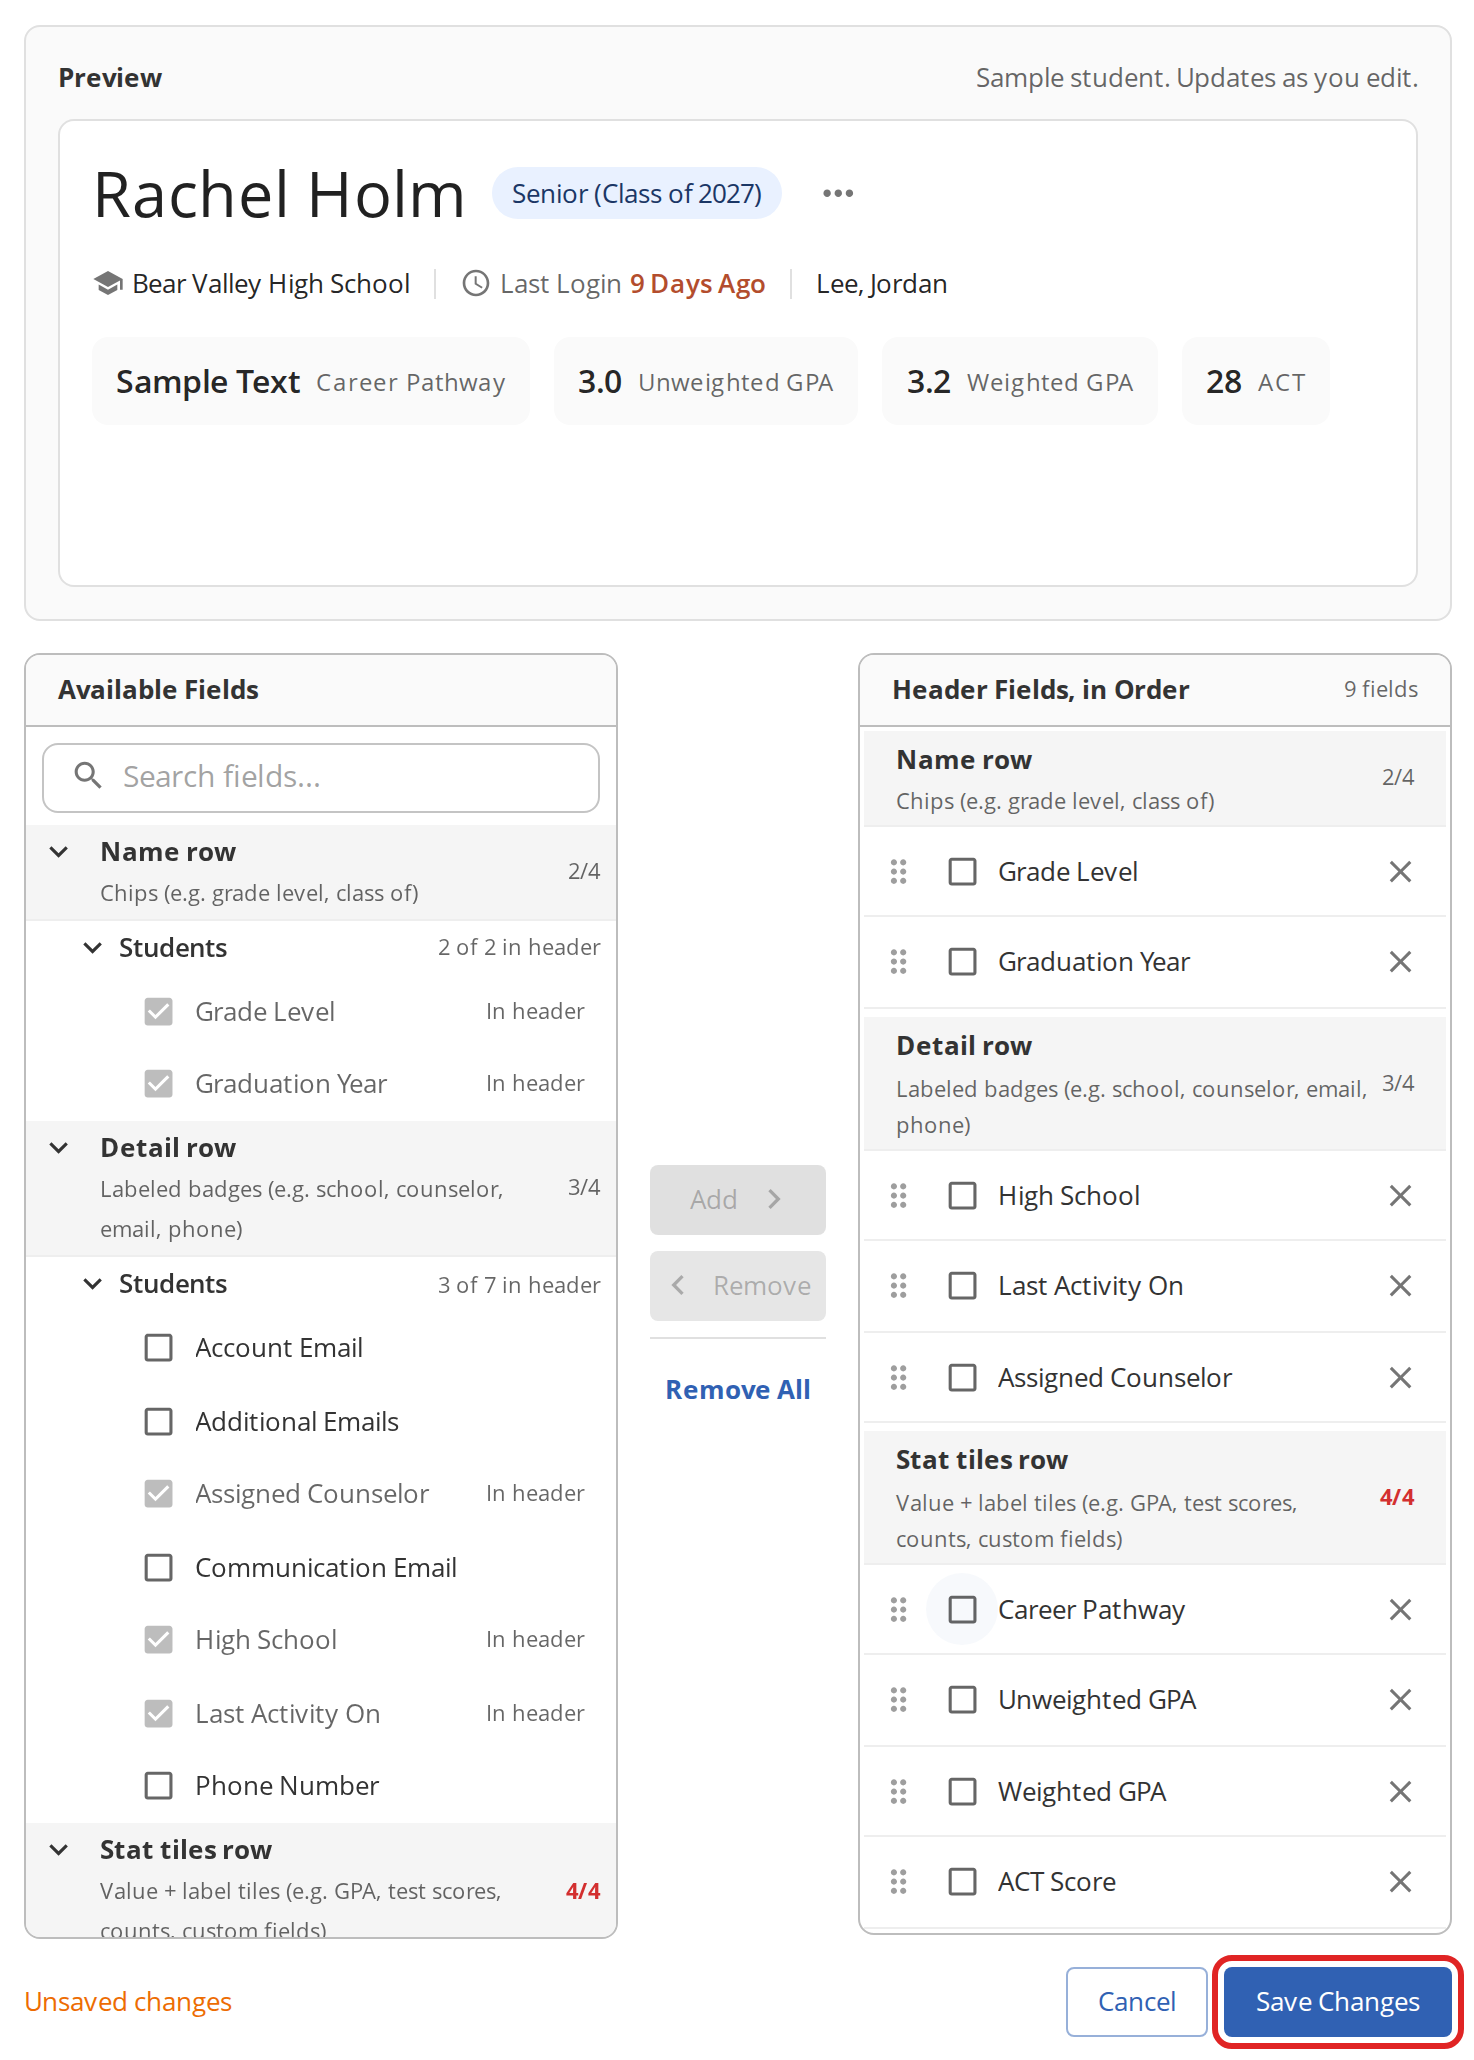
The page has three parts: a Preview of the header at the top, the Available Fields list on the left, and the Header Fields, in Order list on the right.
Choosing Which Header to Edit
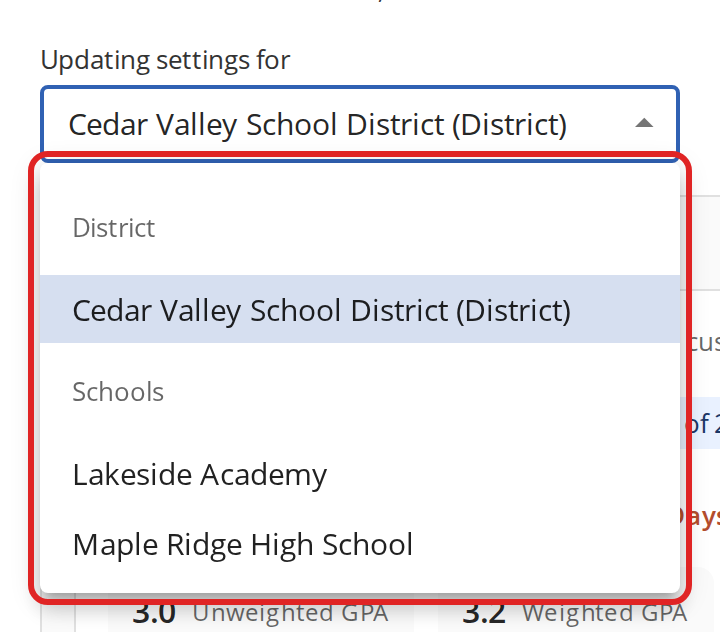
If you are a District Account Manager, you'll see an Updating settings for menu at the top of the page. Choose your district to edit the district header, or choose a school to edit the header for just that school.
Each school's students see the first of these that exists:
- The school's own header, if the school has saved one
- The district header, if the district has saved one
- Overgrad's default header
School Account Managers don't see this menu. Your changes apply to your school only.
Note: Once a school saves its own header, only that school's Account Manager can change it. District Account Managers will see the message "This header was configured by the school; district edits cannot be saved."
Reviewing the Header Layout
The student header has three rows. Each row holds up to four fields, and each field can only go in the row it belongs to:
- Name row: chips next to the student's name, such as Grade Level and Graduation Year
- Detail row: details below the name, such as High School, Assigned Counselor, email addresses and Phone Number
- Stat tiles row: tiles showing a value and a label, such as GPA, test scores, counts and custom fields
The count next to each row (for example, 2/4) shows how many of the four spots are in use. It turns red when the row is full.
The Preview shows a sample student, not a real one, and updates as you make changes. If you haven't customized the header yet, it shows the header your students currently see.
Adding Fields to the Header
- In Available Fields, find the field you want. Type in Search fields... or open a row and category to browse.
- Check the box next to each field you want to add. You can select fields from more than one row at once.
- Click Add.
Fields are grouped into categories, such as Students, Custom Fields, Rollup Fields and Test Scores. Options vary by school and depend on the features your school has. For example, Custom Fields only lists custom fields on the Student Profile tab.
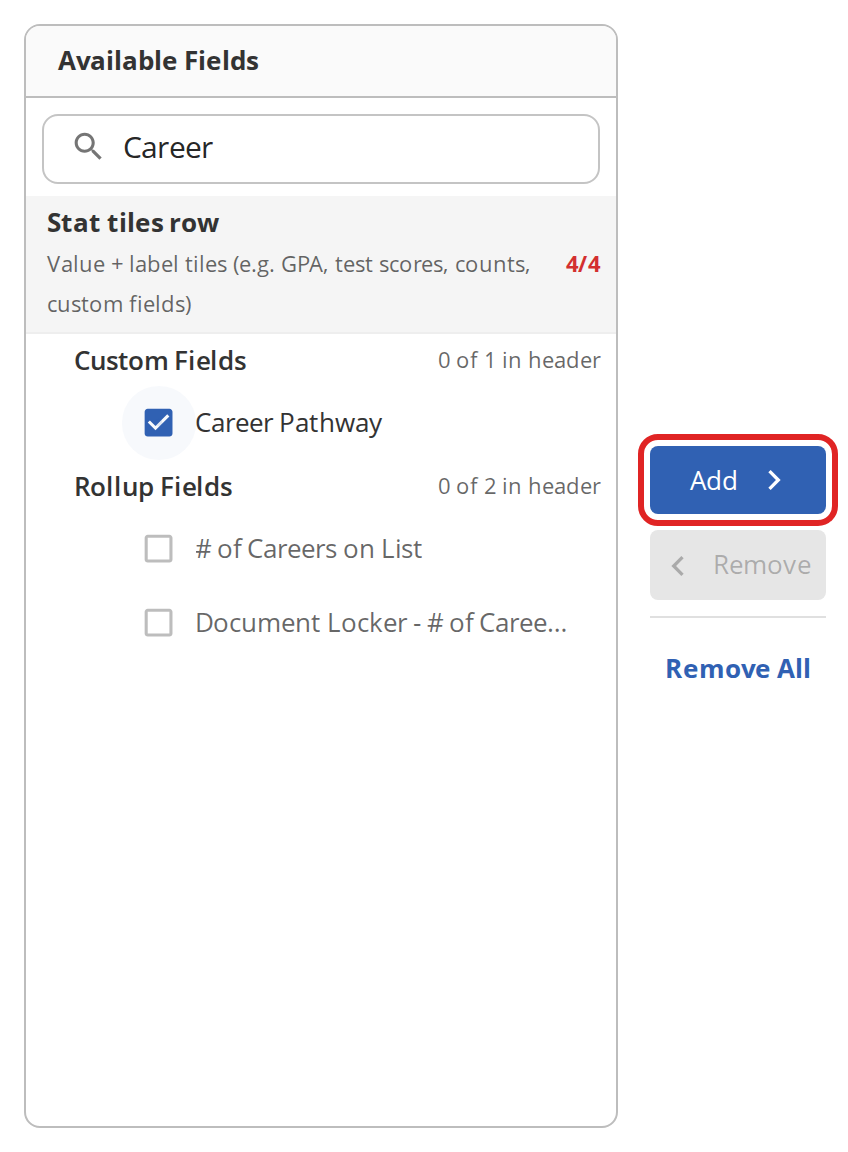
Note: If a row is already full, you can't select more fields for it. Remove a field from that row first.
Removing Fields from the Header
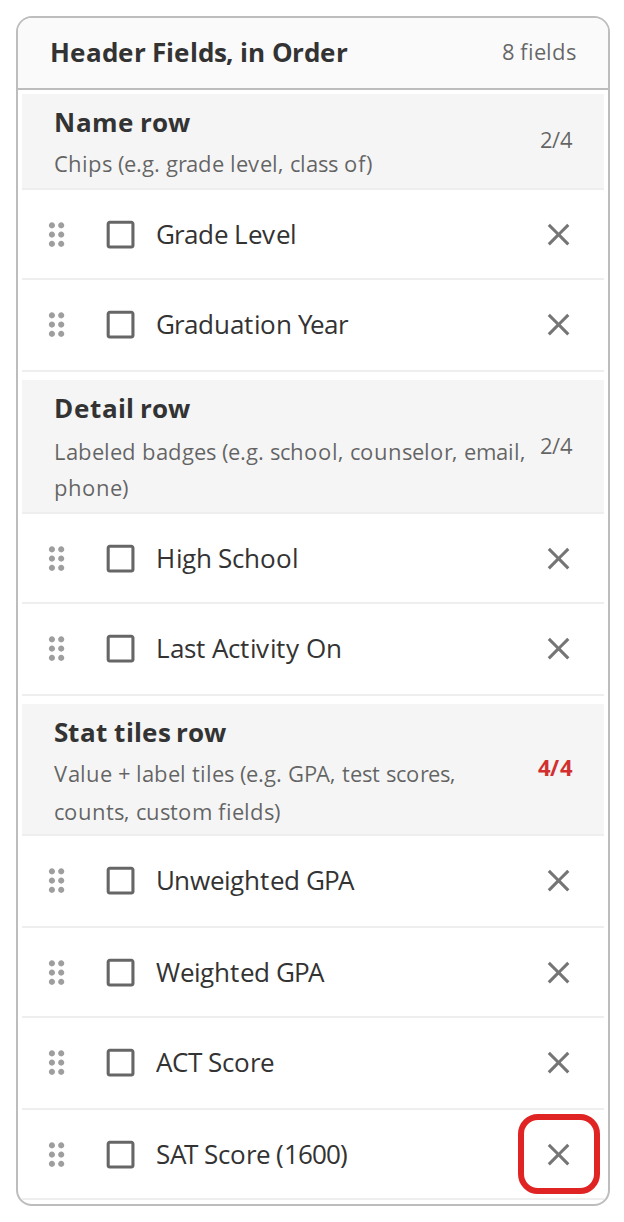
To remove one field, click the X on its row in Header Fields, in Order.
To remove several fields at once, check the box next to each one and click Remove. To start over with an empty header, click Remove All.
Reordering Header Fields
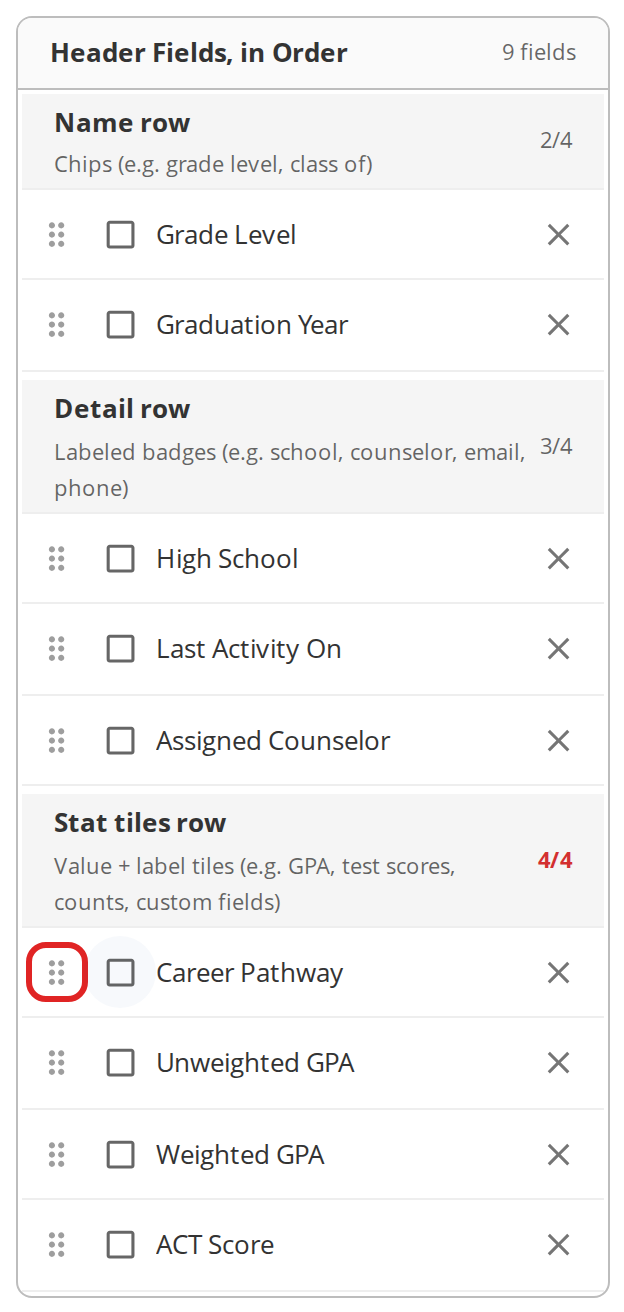
Fields appear on the student profile in the order shown in Header Fields, in Order. To change the order, click and hold the handle to the left of a field and drag it to a new position in the same row.
Saving Your Changes
- Check the Preview to make sure the header looks the way you want.
- Click Save Changes. You'll see "Changes saved successfully" when it's done.
To undo everything since your last save, click Cancel.
Your new header appears at the top of every student's profile at that school or district.

Note: If a student doesn't have a value for a field, that field is left out of their header. Last Activity On is the exception: it shows as Last Login and reads "Never" if the student has never logged in.
If you try to leave the page or switch schools with unsaved changes, Overgrad will ask you to confirm before discarding them.
Reverting a School to the District Header
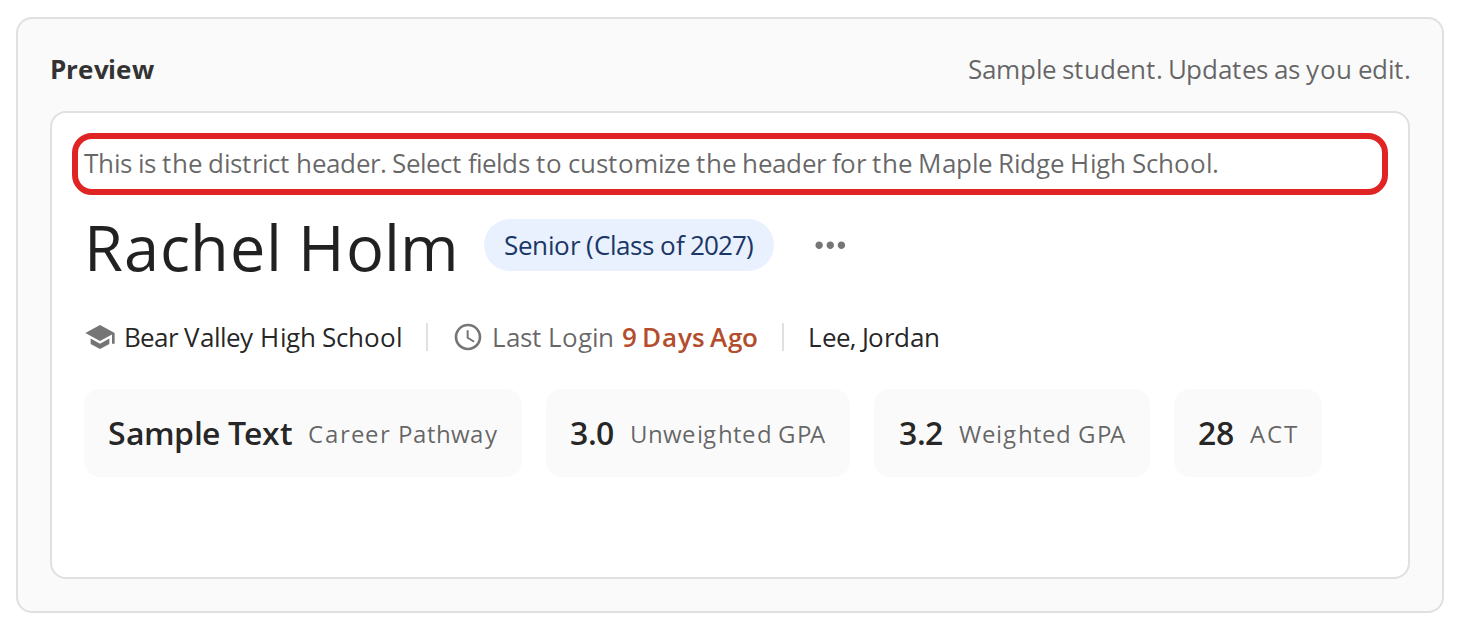
When a school hasn't customized its header, the Preview says "This is the district header." Any change a School Account Manager saves creates the school's own header, which replaces the district header for that school.

School Account Managers can go back to the district header at any time:
- Click Revert to District Defaults at the bottom of the page.
- Click Revert to District Defaults again to confirm.

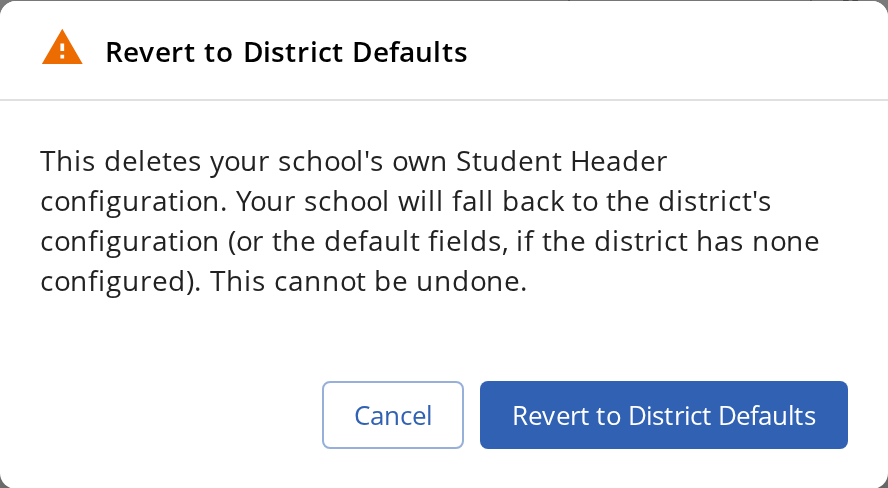
Note: Reverting deletes your school's header and can't be undone. Your school will use the district header, or Overgrad's default header if your district hasn't set one.
Deleting a Custom Field Used in the Header
If you delete a custom field that's part of a student header, it's removed from the header as well. Overgrad warns you before you delete it: "This field is currently used in a student header. Deleting it will also remove it from any student header it appears in."
Still need help?
Contact the Overgrad support team at support@overgrad.com.
Was this article helpful?
That’s Great!
Thank you for your feedback
Sorry! We couldn't be helpful
Thank you for your feedback
Feedback sent
We appreciate your effort and will try to fix the article