TABLE OF CONTENTS
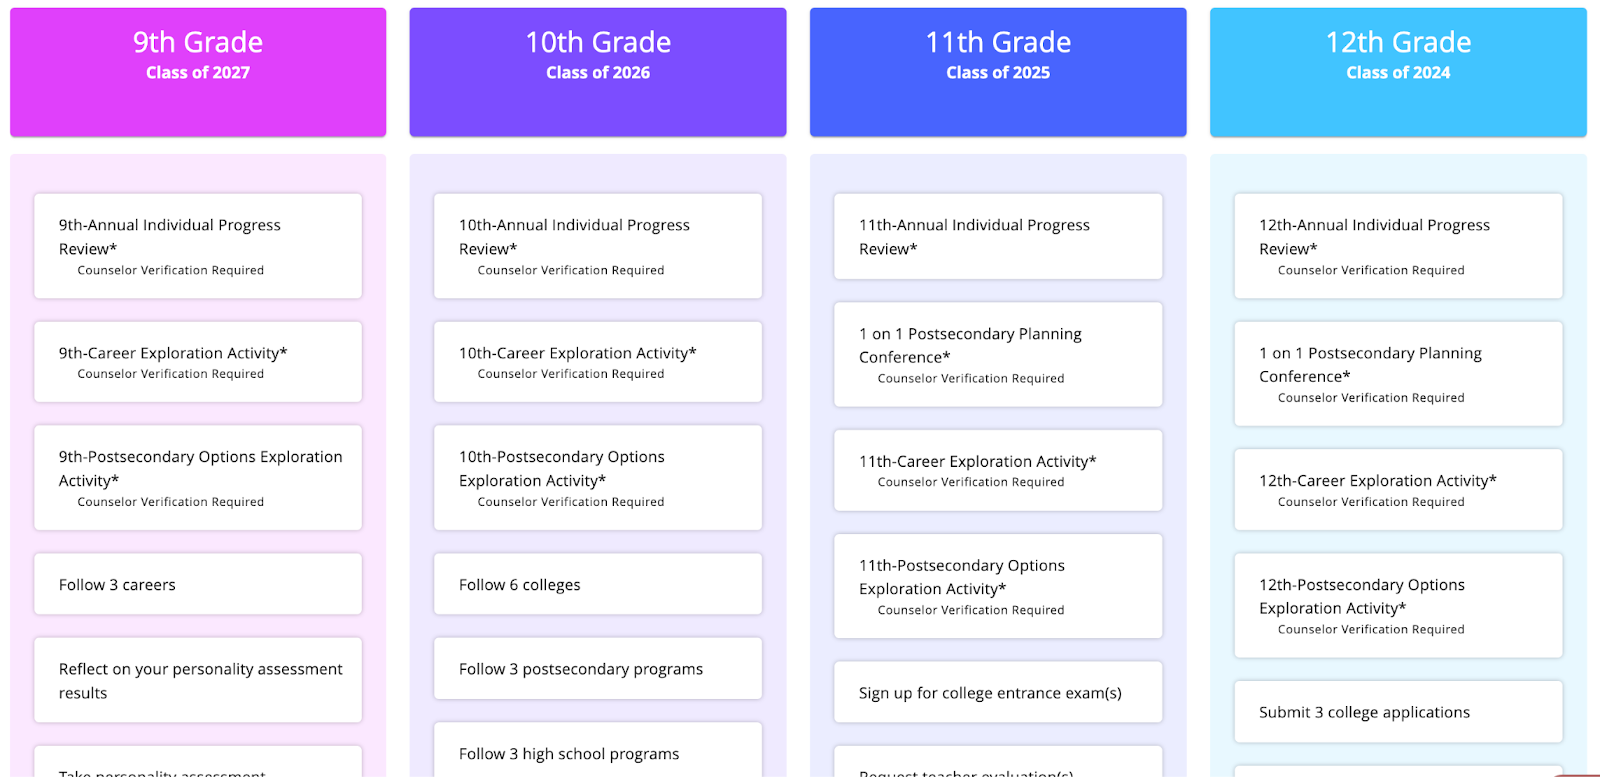
As seen in the image below, Overgrad milestones with an asterisk next to the title will be associated with a STARS experience.
Logging Individual Experiences
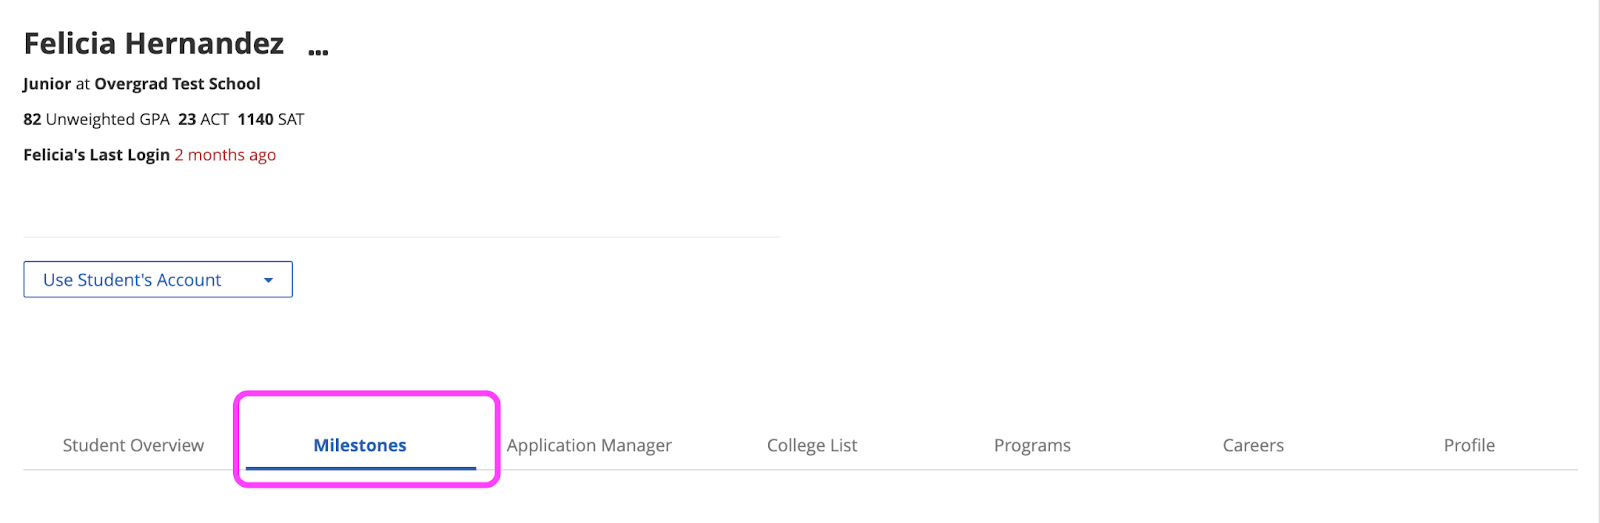
Go to a student’s profile page on Overgrad and click on the “Milestones” tab.
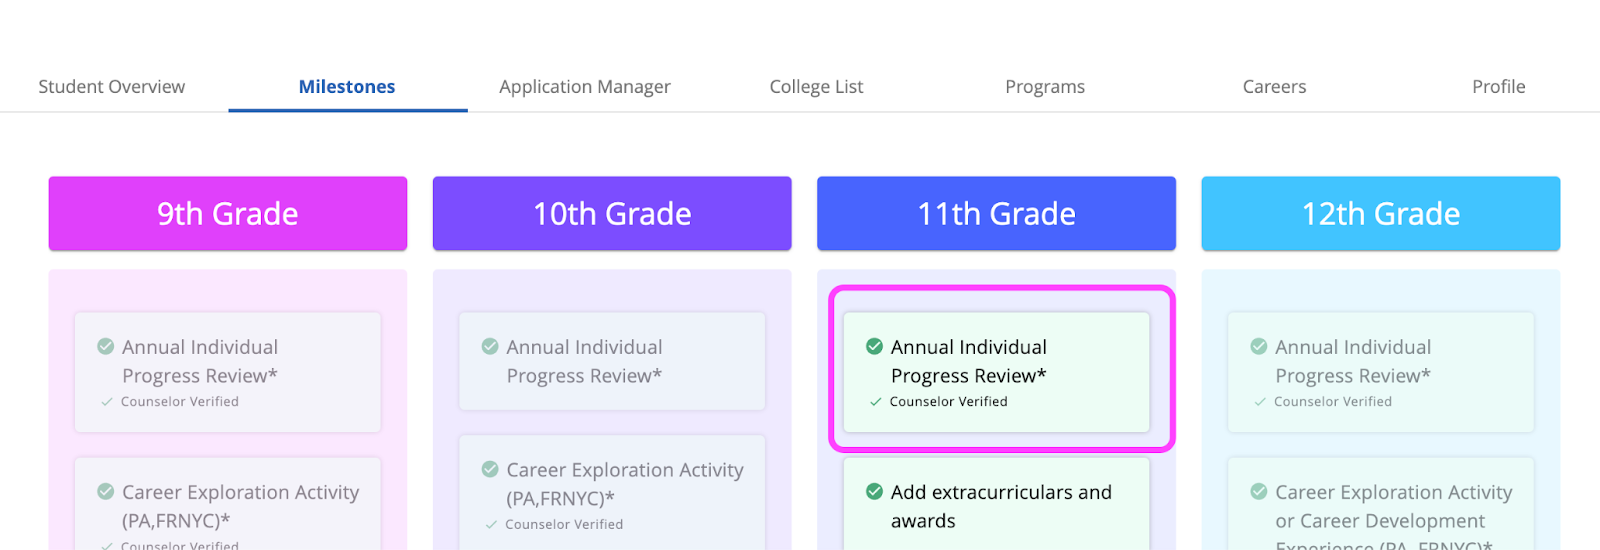
Click on the Experience that you would like to complete. In this example we will be completing an 11th grade annual IPR.
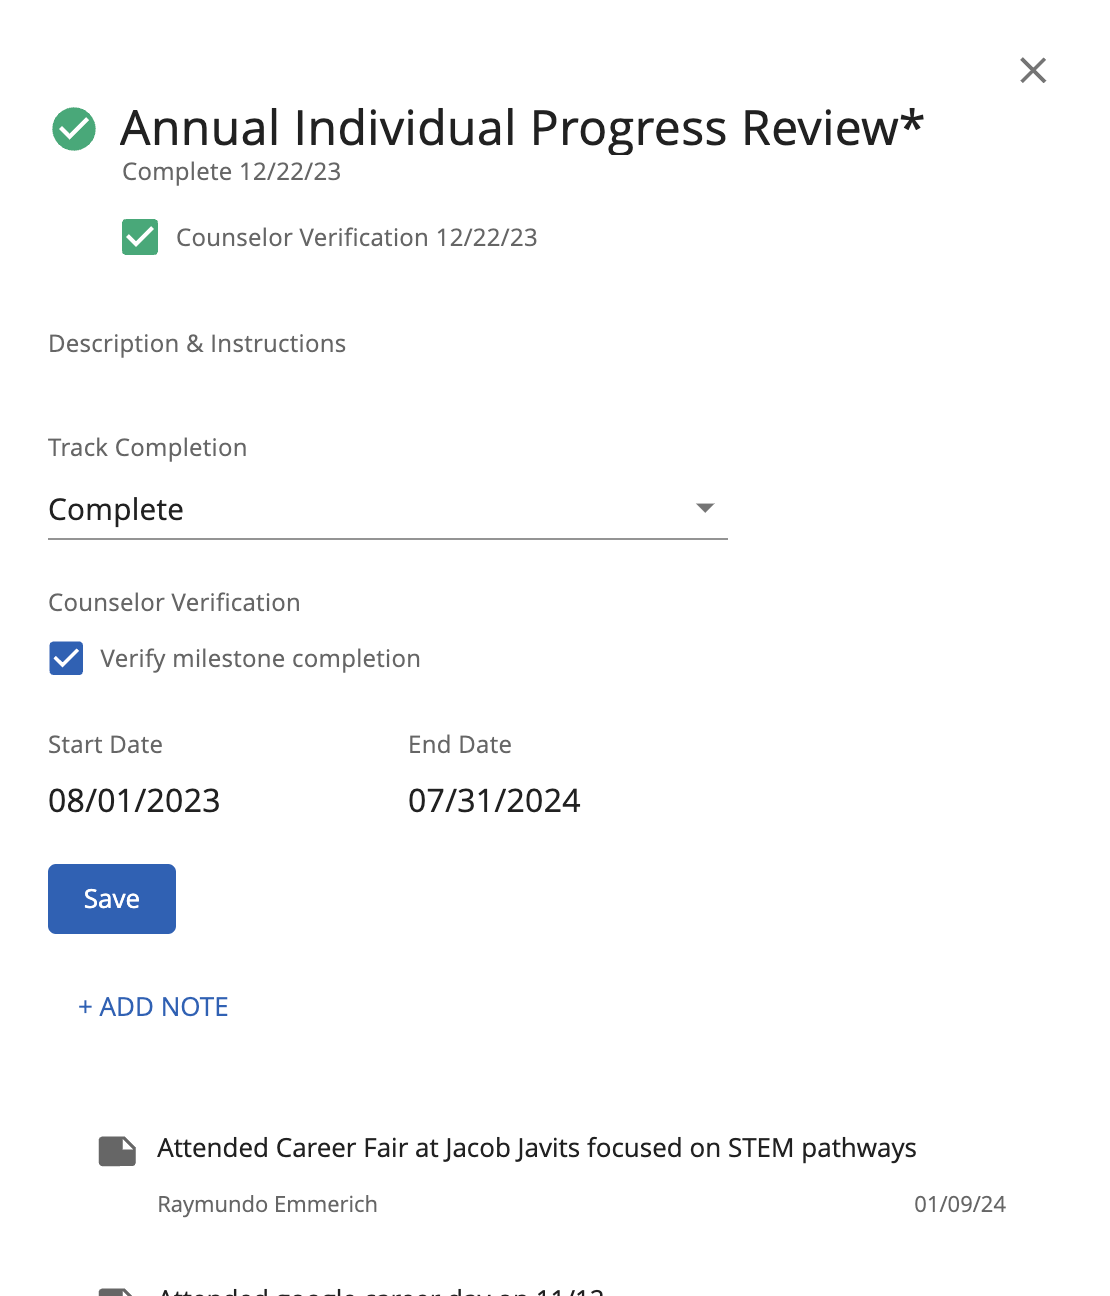
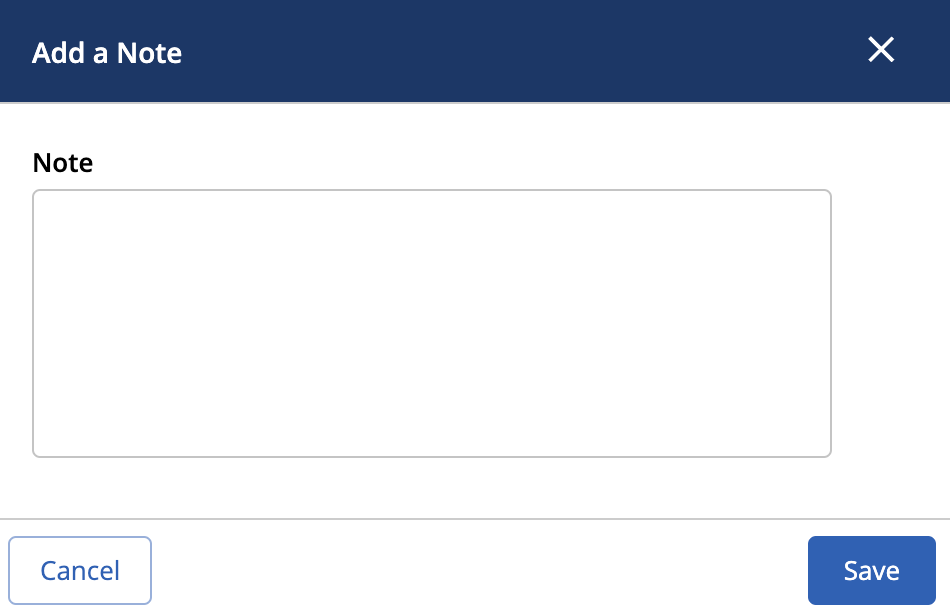
The pop up window will show an “+ADD NOTE” link below the Save button which you will use to add the note associated with the relevant milestone- in this case an IPR. Once you have added your note, hit save and you will see it appear at the bottom of your window below the Save button.
A few things to keep in mind for individual milestones:
If you would like to add multiple instances of a milestone, add multiple notes. Each note will be treated as a separate input of a STARS milestone (e.g., two notes under an IPR will equal two completed IPRs for a student)
The date you input a milestone will be the date associated with the record in STARS. If the milestone is input on a different date from when it happened, simply include the date of your completion in the note text.
Notes will be visible to students so you should format your note accordingly. If you would like the note to not be visible to students, input it directly into STARS.
Bulk Uploading Experiences
This feature is particularly useful for updating experiences such as Career Exploration Activity and Postsecondary Exploration Activity. For example, you may have taken your entire junior class or a large group of students on a college visit. This will allow you to input the same note for multiple students.
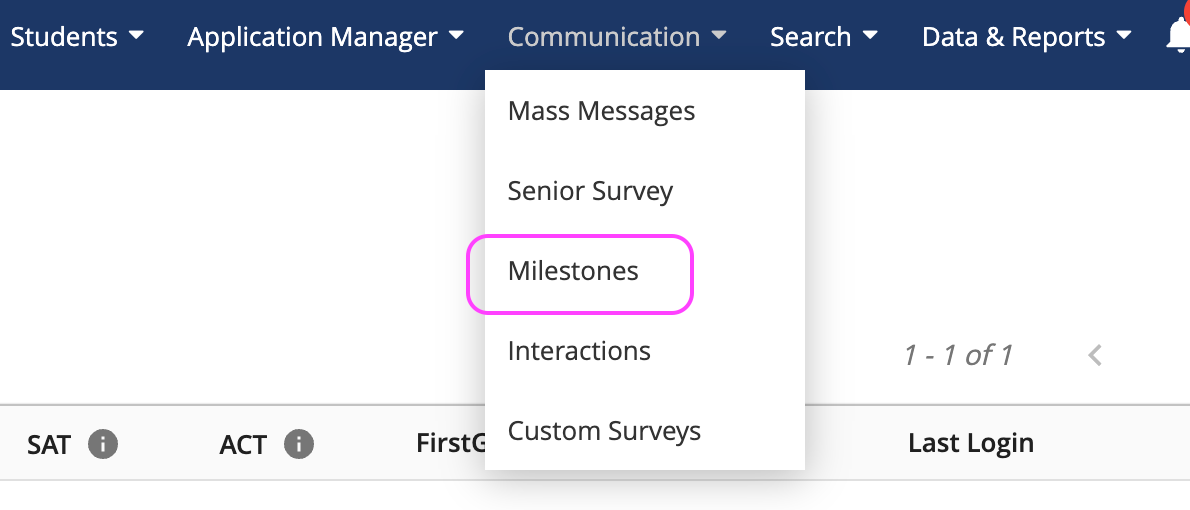
Go to the Communication menu and select “Milestones”
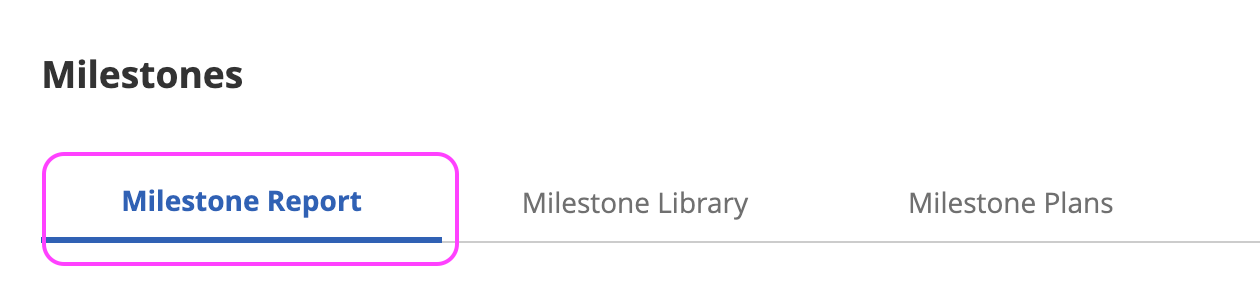
Select “Milestone Report” from the tabs below Milestones.
Select the milestone and grad year for who you are trying to bulk upload a milestone for. For example, in this case we are trying to complete a Career Exploration Activity for all 10th graders who were offered a career fair.
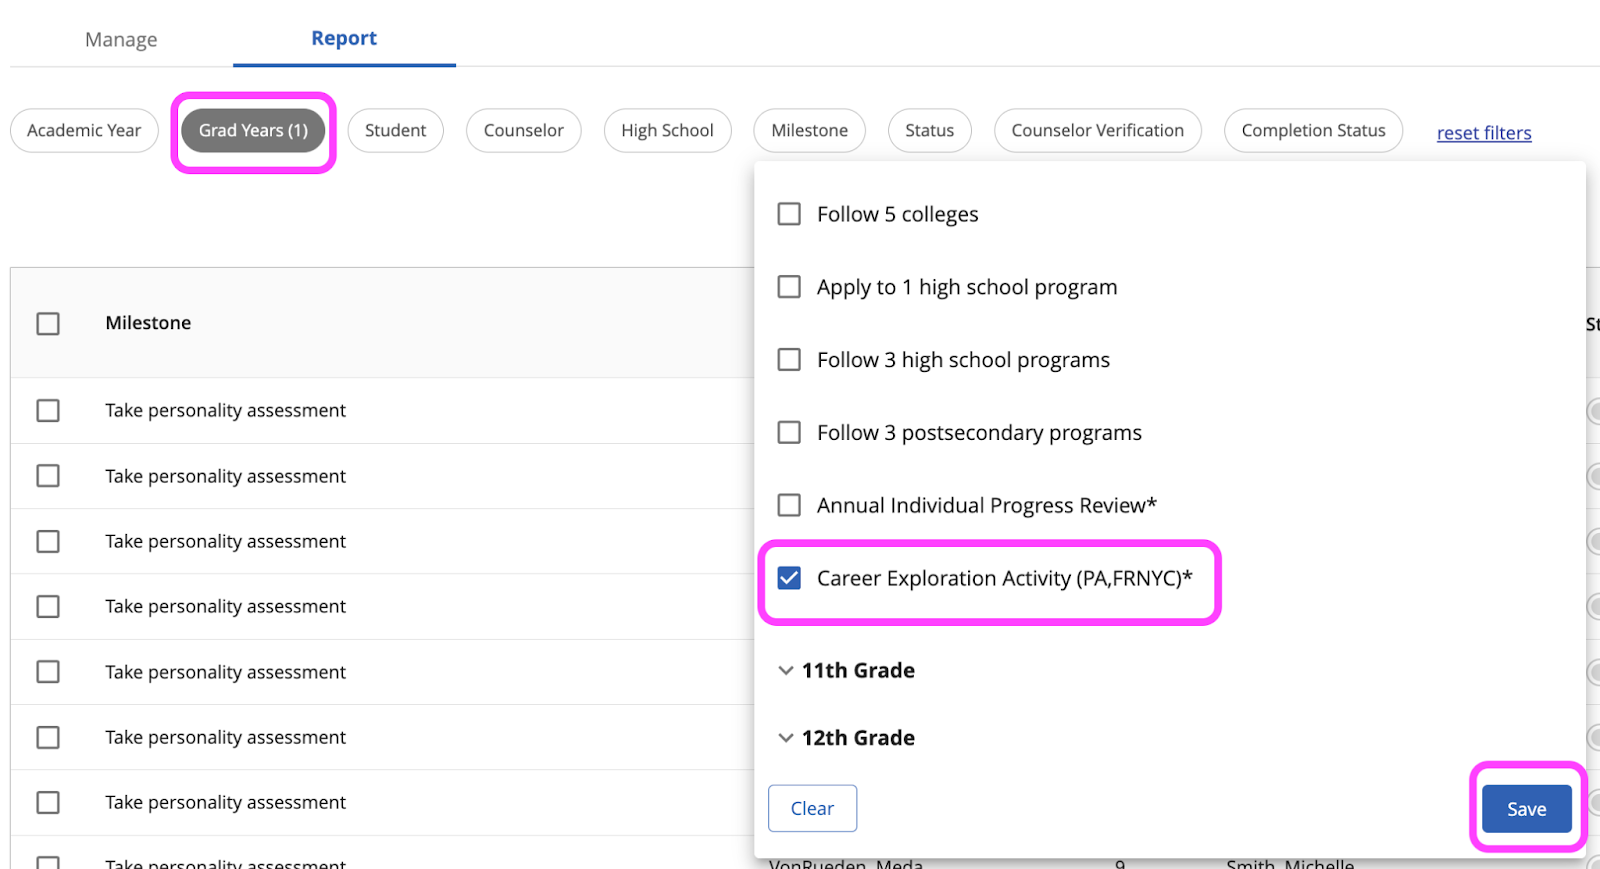
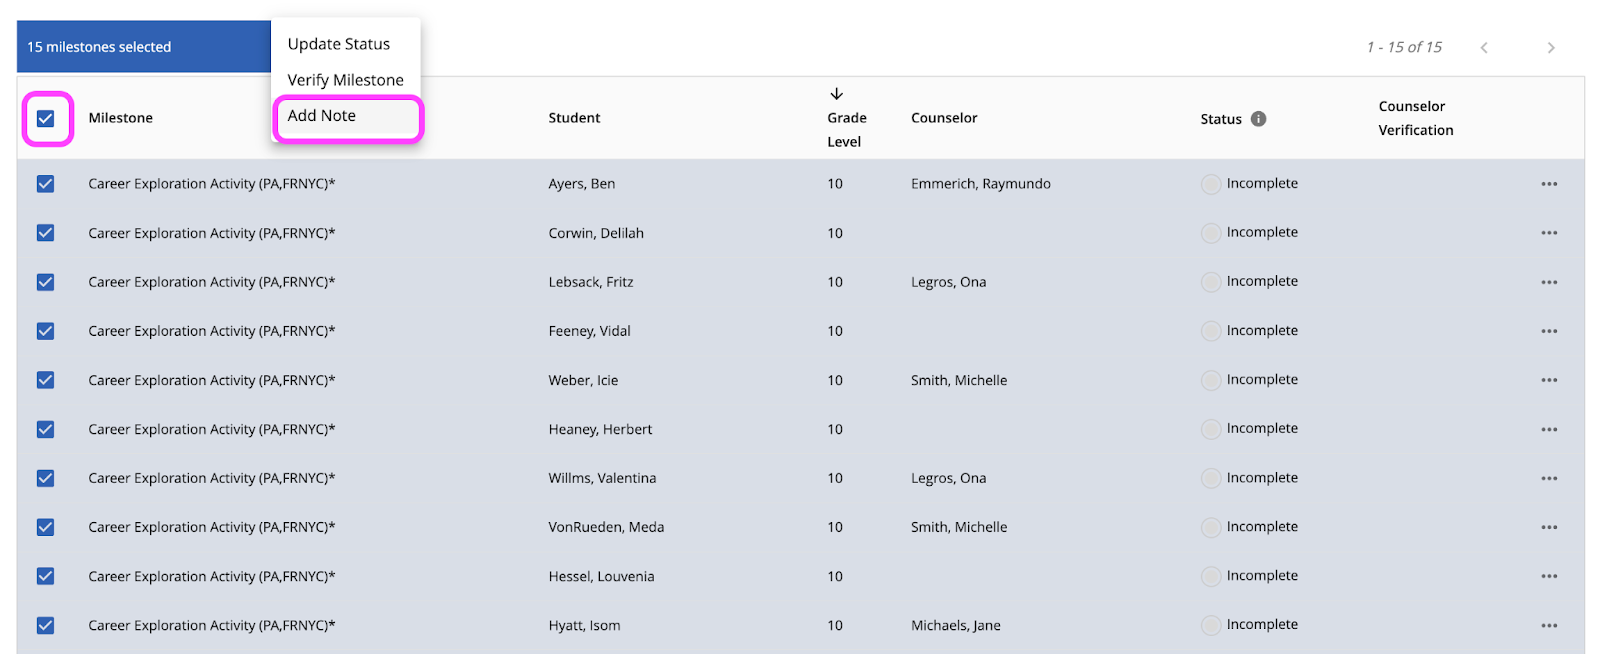
You can either individually check off a group of students or utilize the checkbox at the top of the table to select all students. You can then click the three dots that appear in the blue bar next to the number of selected students and update the status, verify milestone, or bulk add a note as you would for an individual student milestone.
A few things to keep in mind for bulk milestones:
Always be sure to select a grad year in addition to a milestone. Not doing so will complete the milestone you selected for students in all grade levels.
If you require additional support or have more questions, please reach out to support@overgrad.com.
Was this article helpful?
That’s Great!
Thank you for your feedback
Sorry! We couldn't be helpful
Thank you for your feedback
Feedback sent
We appreciate your effort and will try to fix the article