This feature is only available to Overgrad Pro customers. Please connect with an Overgrad rep if you are interested in learning more.
Our Scholarships tool features an extensive, integrated list of scholarships sourced from the Peterson’s database, ensuring you have access to one of the most comprehensive and up-to-date collections of financial aid available. Scholarships can also be created by district and high school level account managers in order to highlight local and high-priority items for your students.
Adding Scholarships in Bulk
Step 1: Navigate to Data Imports
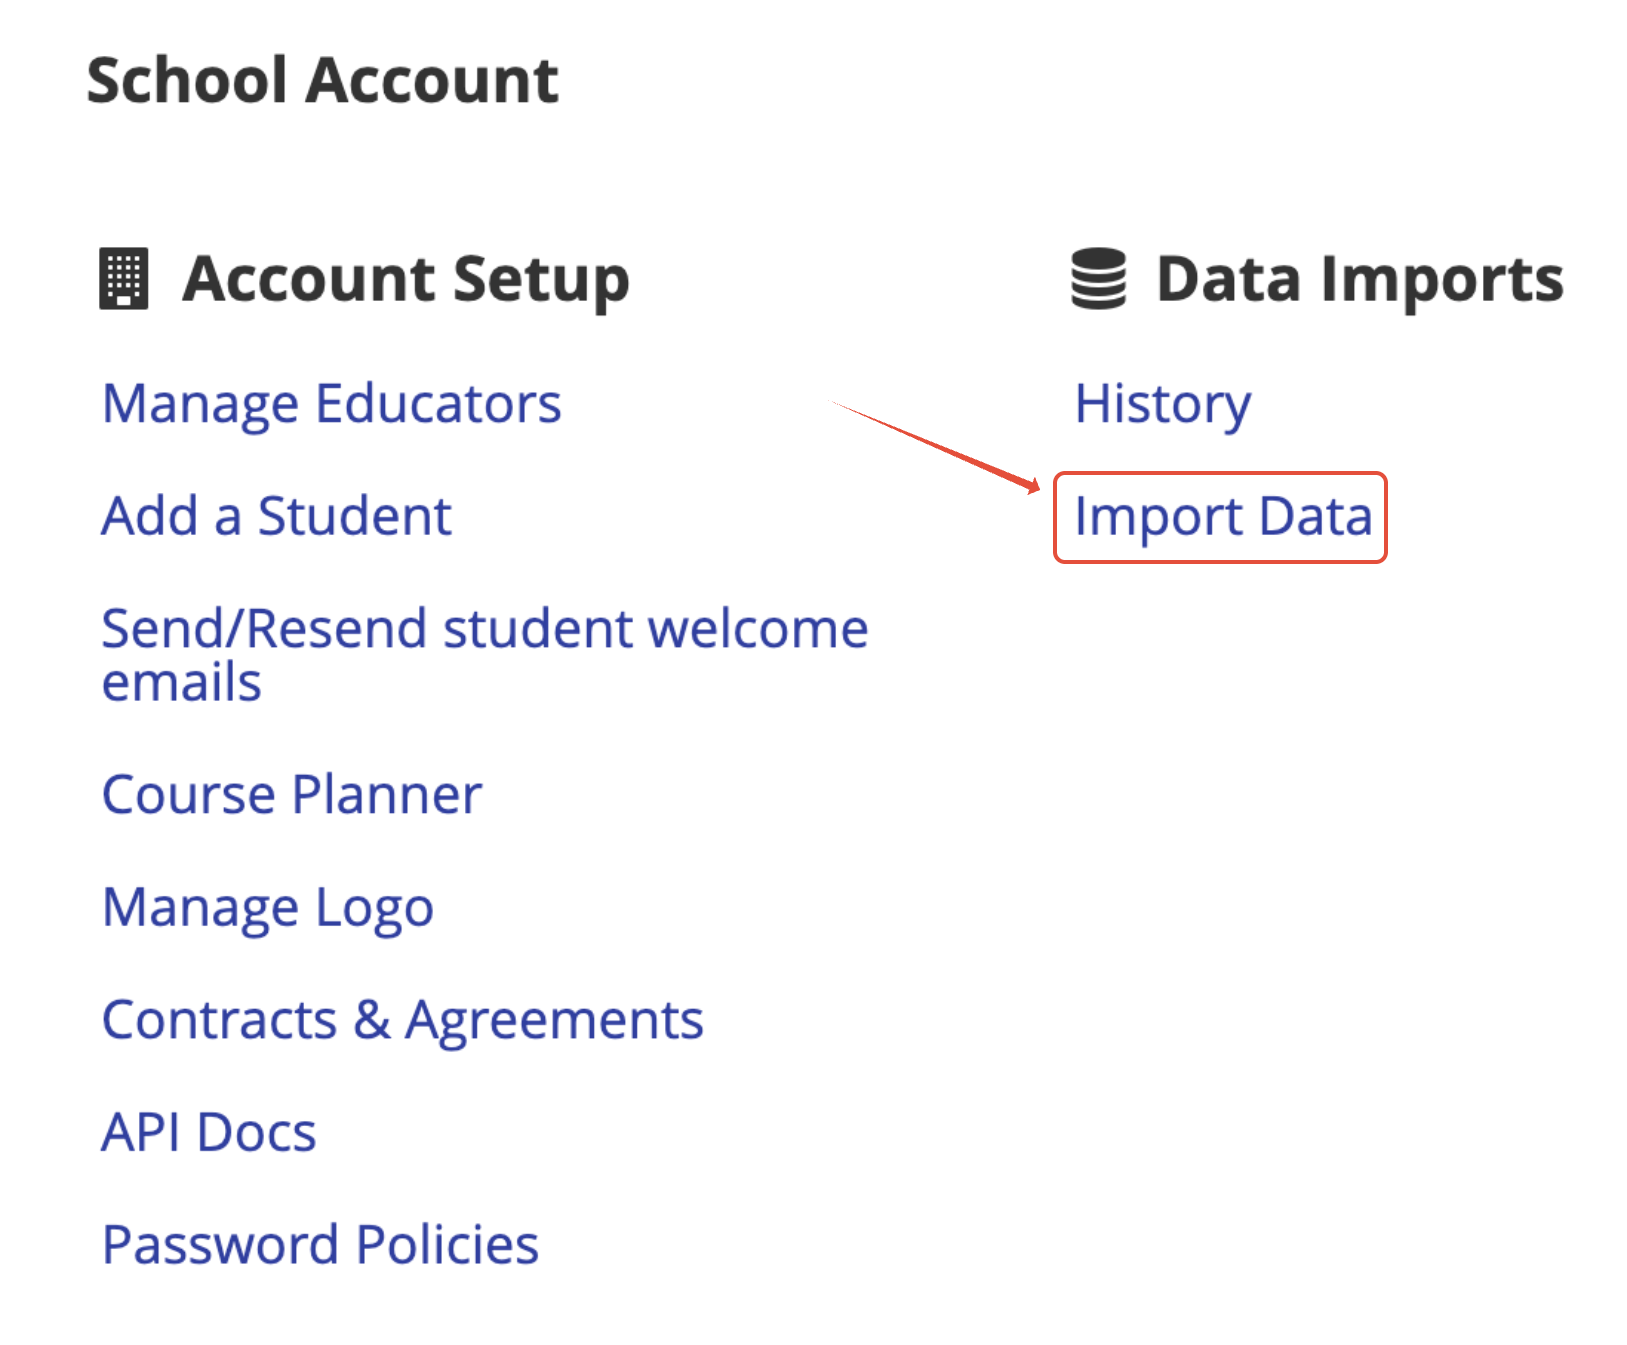
From the Profile dropdown menu, click School Account.
Choose Import Data from the Data Imports section
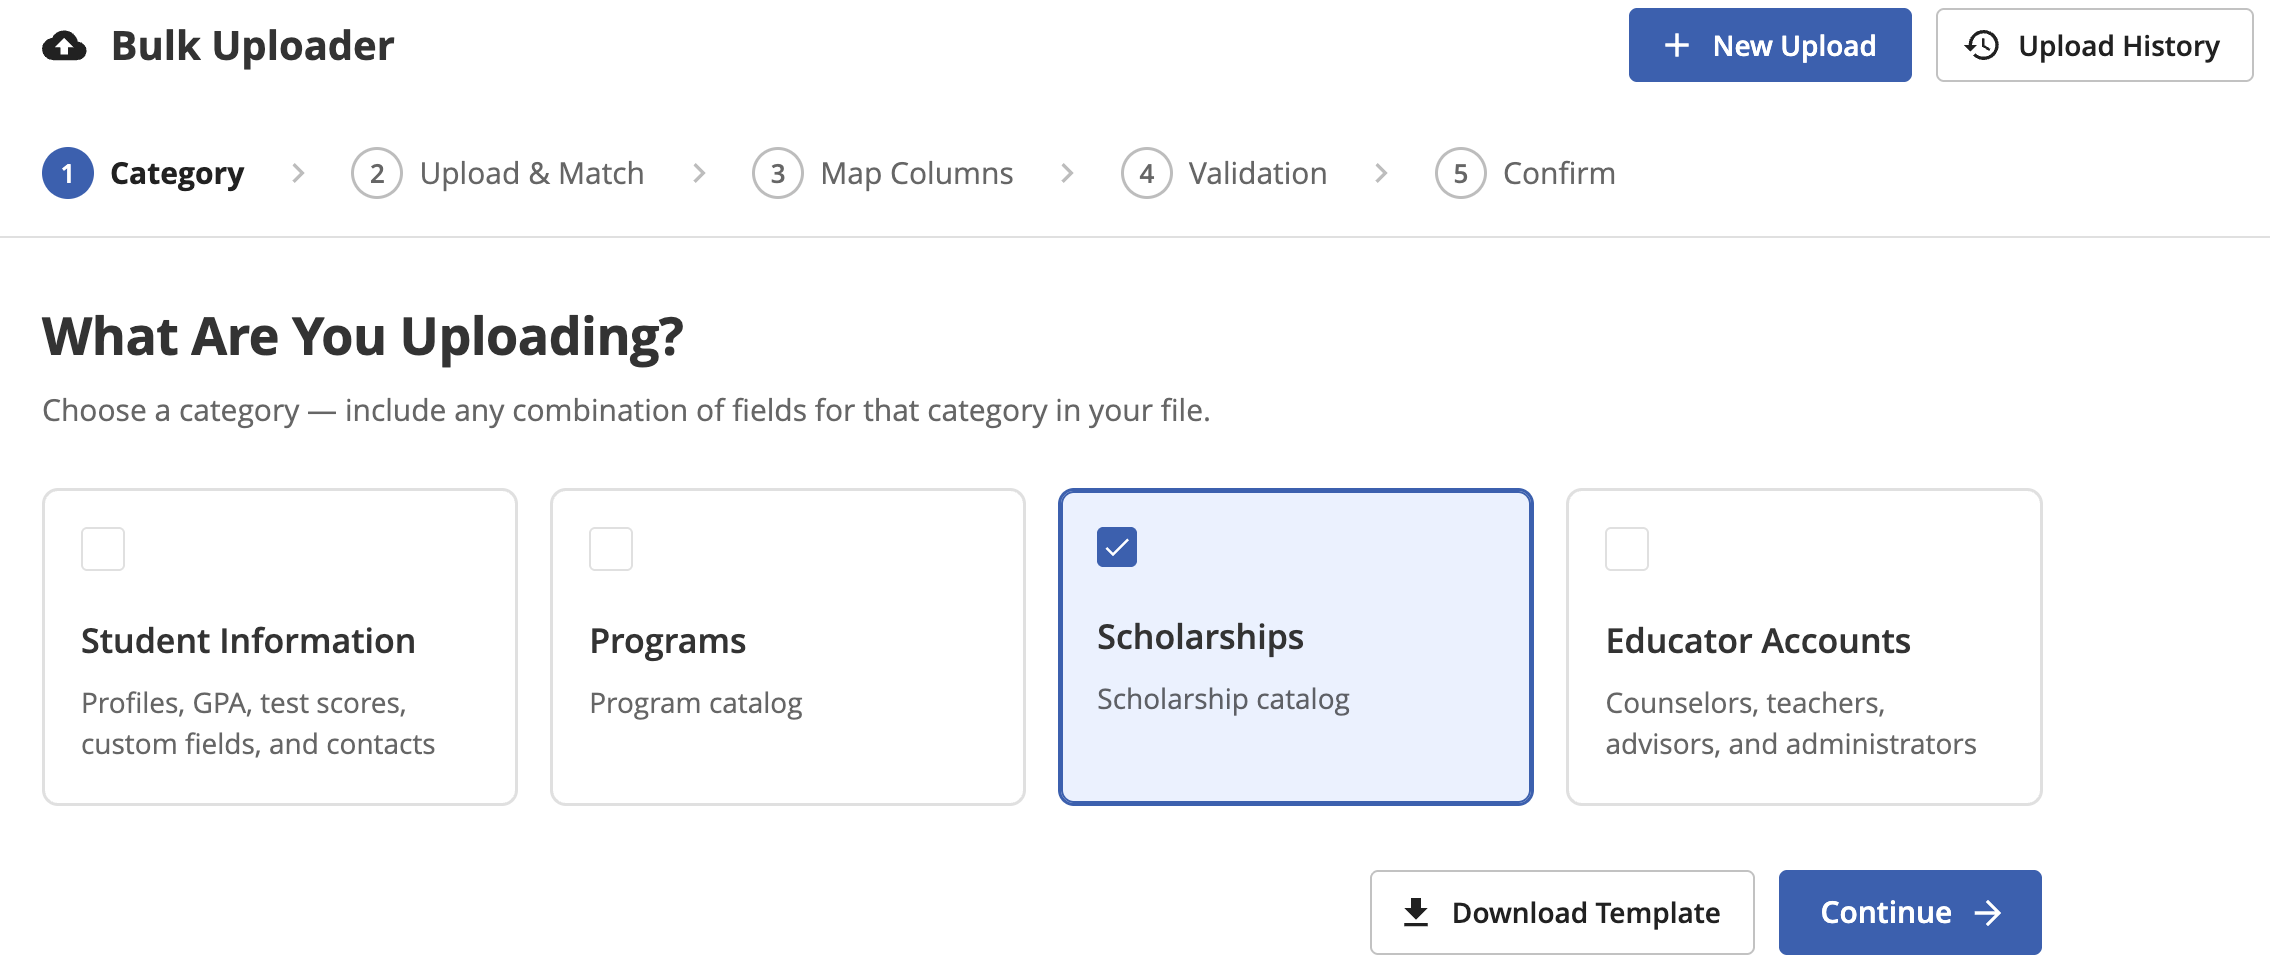
Step 2: Select Import type
- Choose Scholarships from the list and click Continue
Step 3: Upload your file
- Drag and drop your CSV onto the upload area, or click to browse for a file
Step 4: Match your columns to Scholarship Fields
- Review column mapping.
Every column in your file is matched to an Overgrad field automatically. Each match carries a confidence label:
Use the filter chips above the table to jump straight to columns that need attention, ignoring strong matches because they pre-accepted and don't require any action.Label What it means Strong match We're confident — either your district has mapped this column the same way before, or the header and values clearly match a field. Weak match Reasonably confident, but your district has mapped this column differently in the past, or the match is less certain. Worth a glance. Needs review We couldn't confidently suggest a field — map this one yourself. Skipped This column won't be imported.
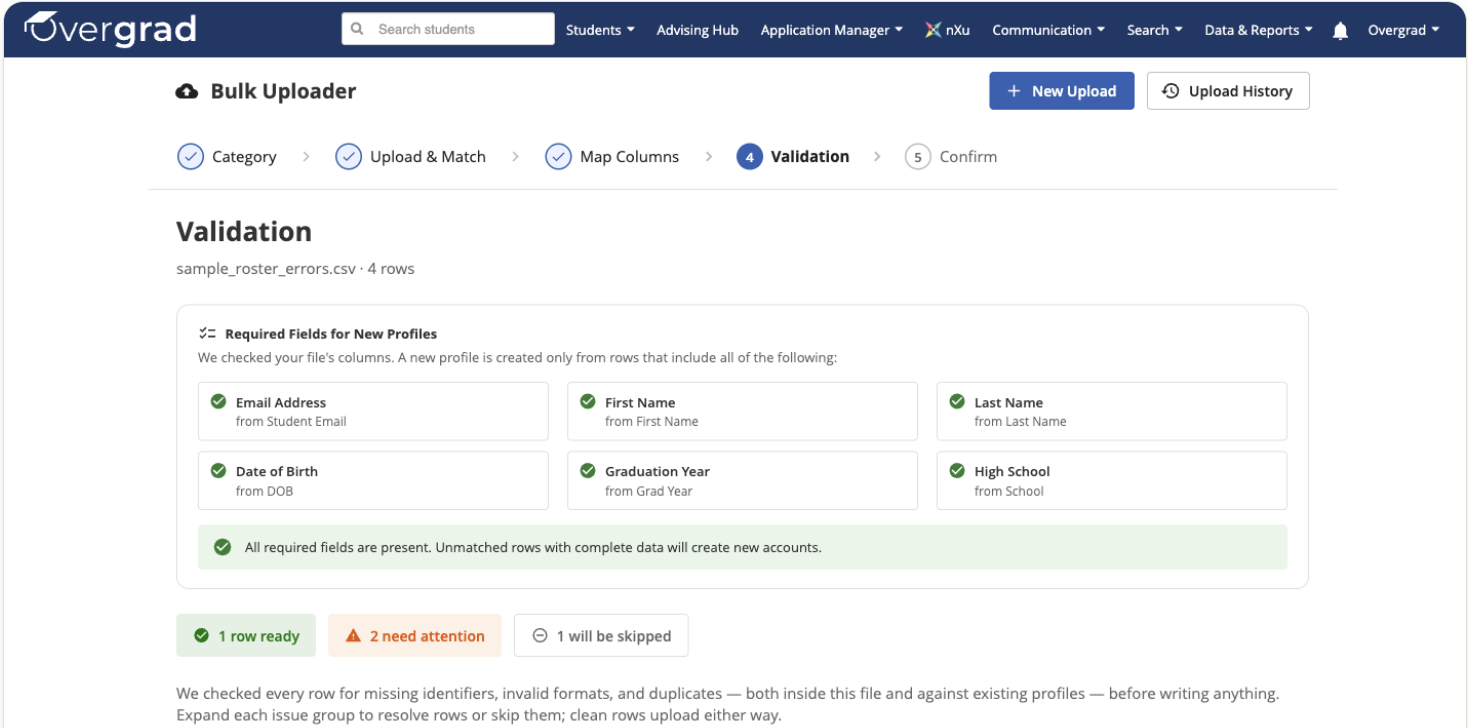
Step 5: Run Pre-Upload Validation
- If some rows have issues, they're grouped by problem type with a plain-language explanation and a row count per group.
- Fix the issues or skip the row
Step 6: Confirm and submit the upload
- The final step summarizes exactly what will happen depending on the data included in your file: what will be created or updated, and how many rows will be skipped.
Add Scholarships Individually
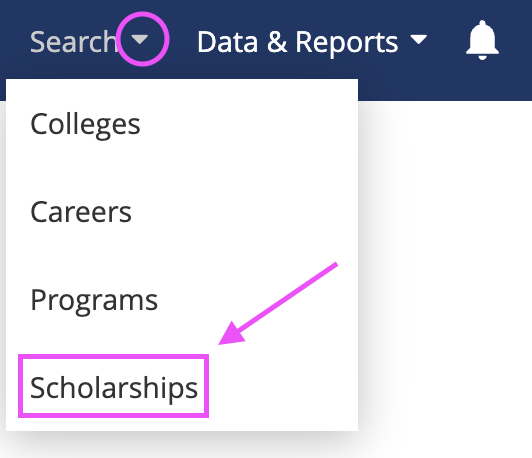
To create a Scholarship, navigate to the Scholarships page from the Search dropdown menu
To create a scholarship, click the Add a Scholarship button

Next, you'll fill out general information about the scholarship (all fields with a red asterisk (*) are required
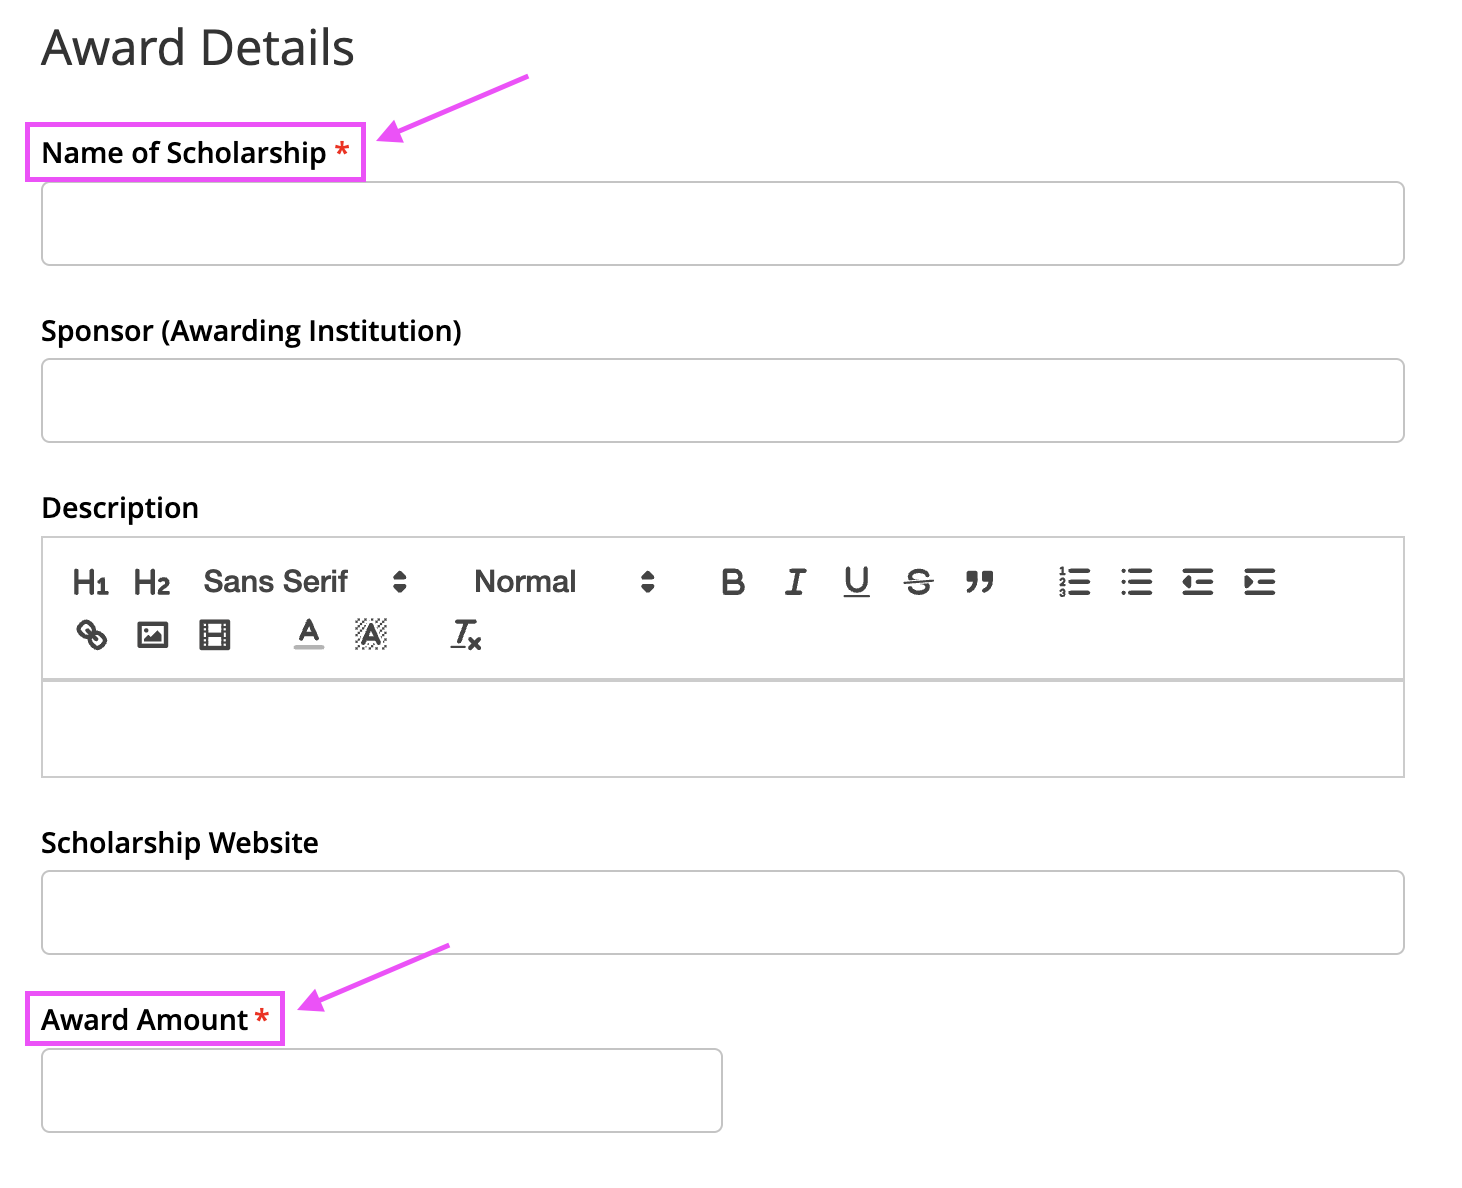
Once you update the general information, you'll be able to add additional optional information
- Eligibility and Requirements: designate if scholarship is open to specific demographic groups through checkboxes
- Eligibility groups will default to "Open to Everyone"

- Eligibility groups will default to "Open to Everyone"
- How to Apply: list requirements, link the application, and add the due date, if applicable
Once you've added all of the optional information that you want, click the Add Scholarship button at the bottom of the screen
You've now successfully created a scholarship! It will show up on your scholarship page for all students. 11th and 12th grade students, as well as all high school graduates, can follow and track scholarships.
If you'd like students to search specifically for educator-created scholarships students can use the filters and select Source > School Created to focus their search on the scholarships you have added.
Was this article helpful?
That’s Great!
Thank you for your feedback
Sorry! We couldn't be helpful
Thank you for your feedback
Feedback sent
We appreciate your effort and will try to fix the article